
This is a blog post that a lot of people have requested from me. To learn how I edit my photos for my macro photography Instagram account. Recently I have released a blog post, describing the workflow of managing my Instagram account. Organizing, planning and managing an account, which photos flow smoothly from one color to another is not as easy as it may sound. Take a look at my recent blog post How to create a chromatic Instagram feed showcasing your best photos? to read more about the topic.
Editing photos is a roller-coaster for me. Sometimes the road goes down, and the edit is done in a couple of minutes. But sometimes it takes a while to get the edit up, and often I have started an edit to end up discarding the photo, because nothing feels right for me.
TABLE OF CONTENTS
My photo editing applications
If you’ve read another blog post of mine Top 5 Instagram photography editing apps I use as well as if you’ve taken a look at my before and after blog posts – you might know that I mostly edit my photos in Adobe Lightroom. I edit my photos on my phone, which is handy, because I can edit photos on my way to work, or just chilling in my bed. Besides Adobe Lightroom, I sometimes use following applications: PicsArt, Snapseed, Polarr and Lens Distortions. But my editing workflow always starts in Adobe Lightroom.
Working in Adobe Lightroom
I mostly use Lightroom, and can suggest it because you can always return to your edits and change something in case you notice something that does not look good after exporting the photo. I often edit my photos over the course of multiple days. Unless I see a potential edit right away, I try something out one day and return to the edit the next day.
As I mentioned, it’s different for each photo on how I edit my photos. There are some photos that I instantly know the desired result for, and I work with the edit on achieving it. But when I don’t have a specific idea in my head, I head to my saved presets.
Saving presets from Adobe Lightroom’s “Discover” section
Since a couple of months back, Adobe Lightroom has a new section called “Discover”. People share their edits to the “Discover” section, and anyone can view them. If the user has not checked out the option, anyone can also save the edit as a preset. I too have shared a lot of my edits in the new section, and I have also had my edits being featured on the front page of the section.

I love the new “Discover” section in Lightroom. I’ve found tons of new presets by saving other people’s edits if I find the difference (between before and after) attractive. If you’re new to Lightroom, I highly suggest to check out this section and see if you can find edits that you would like to apply on your own photos. It’s a great way to start with editing if you’re unsure about all the controls.
In the new Lightroom version next to the “Discover” tab there’s also a “Learn” tab. It’s filled with tutorials, in which you can follow steps to edit a photo and learn on how to achieve such edit yourself.
I have also created some presets of my own. You might be familiar with my Spring vibes preset pack. Since I edit on my phone, there are some editing options that are not available on the Lightroom CC version. One of those is Camera Calibration. It’s possible to alter the tones of the photo before starting the whole editing process. If you apply a Camera Calibration setting on a photo, using the HSL slider will use the altered colors, not the colors originally in the photo. That’s a reason to create some calibration presets to use on your photos. Did you know that my Infrared and Infrayellow presets use camera calibration?
Starting the edit with a preset
Sometimes I use my own created presets, or presets with just camera calibration as a starting point. Applying a preset does not mean that the edit is done. You have to look at it more like a starting point for your edit to continue tweaking it as you please.
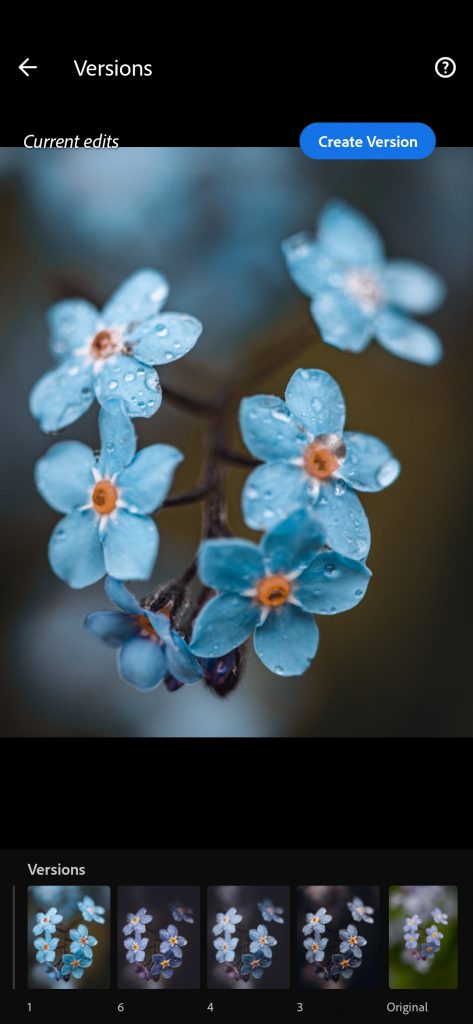
If I decide to start with a preset, I try out different presets that I have saved or created to find out which gives me the mood that I desire. Thanks to another new feature of Lightroom, I can apply a preset, save it to Versions, and continue going through the presets. I then compare the saved presets and choose which of the moods I like the most as a starting point.
After applying the desired preset, I alter the exposure, shadows and highlights of the photo (because very rarely the original + preset = perfect lighting). I use the HSL slider a lot to alter the look of each of the colors in the photo. I can make the pinks look more blue, or desaturate the green tones. It’s up to what’s your goal with the photo.
For the local adjustments on a specific place of the photo, I use the selective editing tool. I often use the radial gradient tool to adjust a specific area of the photo. To make the subject pop more, and to drag the attention of the flower/mushroom/insect more. By using the brush tool, it’s easy to enhance the tones and make the image look less flat. If you brighten the light parts and reduce the brightness in the darker parts of the petals, the flower will look more alive.
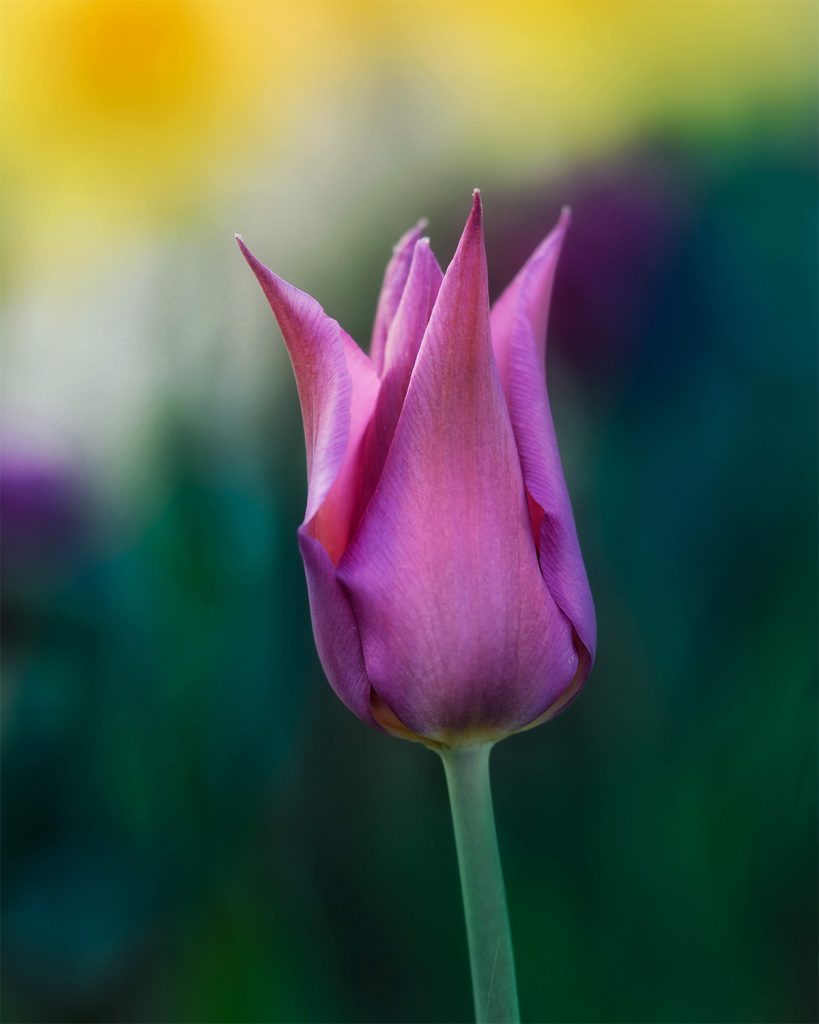
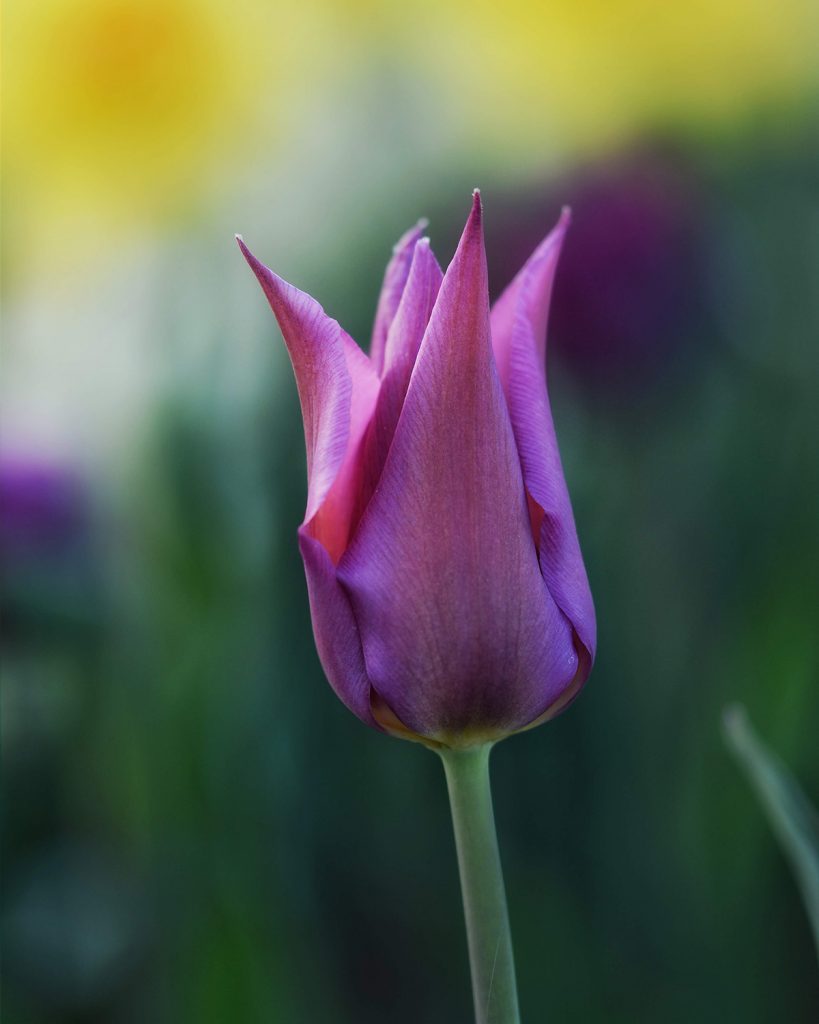
Take a look at this example to see how only highlighting and shadowing the curves of the petals changes the whole picture.
Starting the edit without a preset
Either when I don’t feel like any preset is working, or when I know what I want to achieve by starting all the edits manually, I edit my photos by starting with RAW unedited photo.
Main adjustments: Brightness and colors
Often I tap on the “Auto” to have Lightroom brighten the photo correctly (although sometimes the auto makes the photo worse :)) ). Alternatively I change the exposure, shadows and highlights sliders to have the correct brightness on the photo. If I desire to change the tones of the photo, that’s the next thing I do. I head to the HSL tab and alter the colors, change the hues and saturation.
Removing the noise
After changing the hues in the HSL tool, and then zooming in, I sometimes see noise that created between the transitions between different colors. In such cases I use Noise reduction and Color noise reduction sliders to make the background smoother. Be careful with these though, because you can lose the detail in your main subject by sliding them too much to the right.


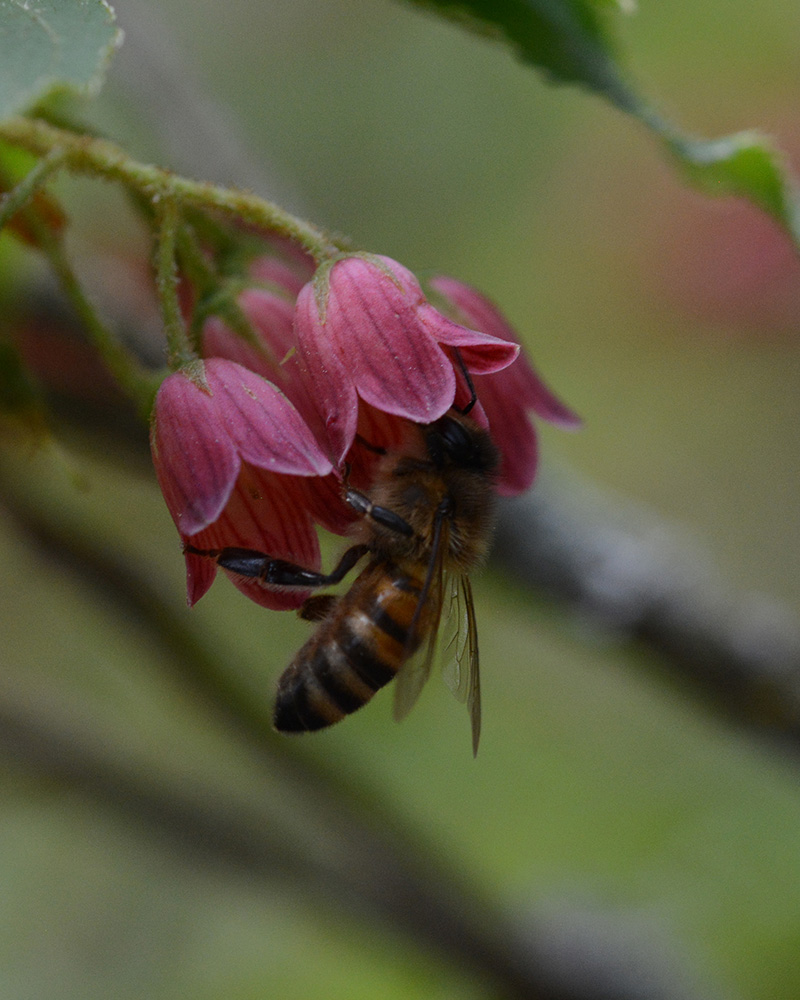
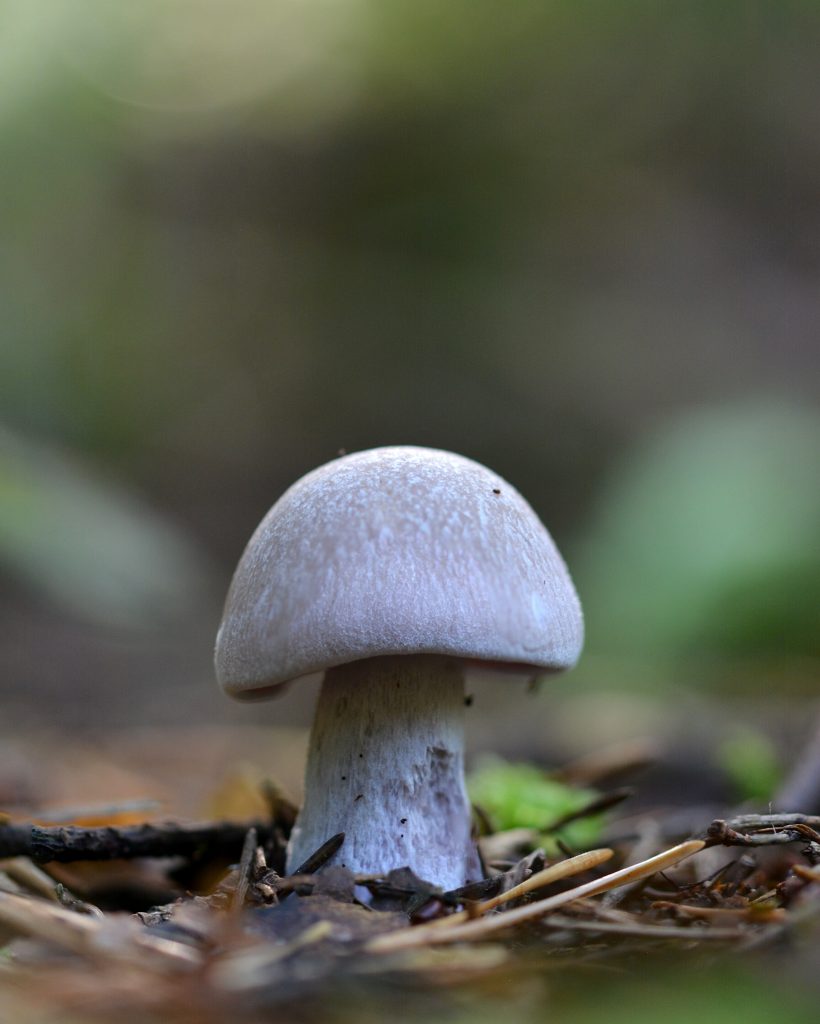
Take a look at how Lightroom’ s noise reduction can enhance the background colors.
Accenting the subject
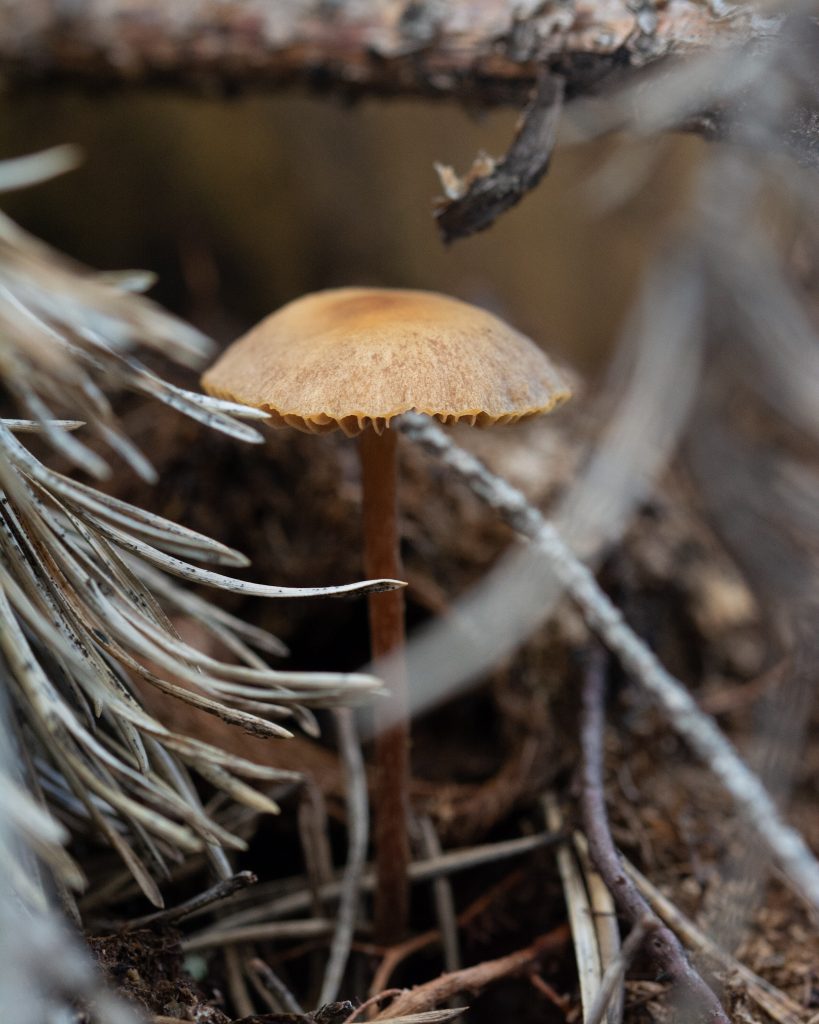
I then remove the distractions from the photo by using the healing tool. I like to work with the photo that has all the distractions already removed.

Take a look at how I removed all the distractions from the photo above by using Lightroom.
By using the selective editing, I accent the main subject by brightening it up and adding contrast, texture and/or clarity to it. If I want a moody look, I sometimes add Vignette to darken the edges of the photo, which drags even more attention to the main subject. This can also be achieved with radial gradient that has been inverted.
I often tend to introduce new colors in the background or accent the existing ones. Here’s a recent edit of mine of mushrom in the forests. The colors in the background add a magical aura.
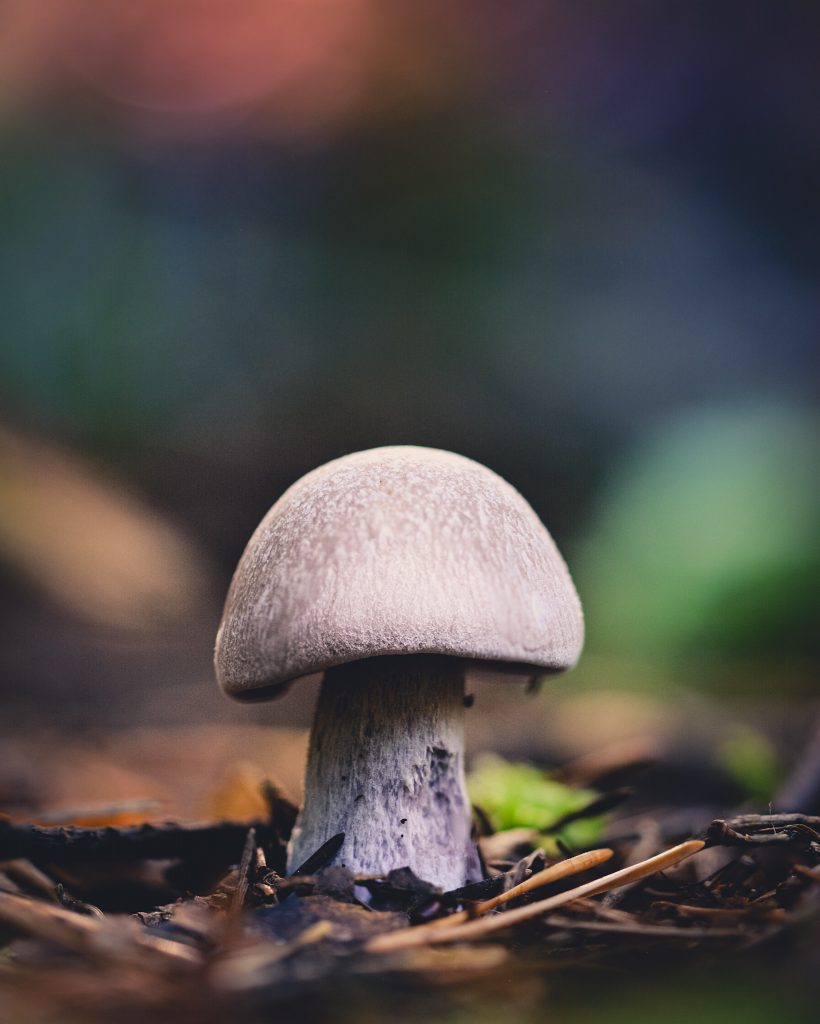
To do that, I use radial gradient and change the Color, Saturation, Hue, Tint, Temperature and Dehaze sliders. You might have noticed some of my photos having colorful background. Or background changing from green to purple. That’s achieved by this tactic.
Additional edits
By adding a slight split toning to the photo, it’s possible to change the tones of the highlights and shadows, therefore changing up the photo’s mood. The mood can also be set by adjusting temperature, tint, vibrance and saturation.
If I desire a moody and dark photo, I play with curves.

A very minor S curve and uplifted shadows will make the photo pop more, and add a hazy look to the darks.
Cropping the photo
In the end I crop the photo to 4:5 aspect ratio (that’s the one I use for most of my Instagram pictures). After cropping I sometimes notice some more distracting objects that grow from out of the frame. I remove such objects by using the healing brush tool. Sometimes I need to remove the crop to be able to so do, because when you use the tool on the “heal” mode, the distraction gets blurred on the side of the photo, because the object continues outside of the crop. When the “heal” mode does not work, I use the help of the “clone” tool, which completely replaces the spot with another.
Though, when the photo needs a lot of zoomed-in cropping, I often start the whole edit with the crop. And then I continue my editing process with the cropped in frame.

While I described my editing process, I opened up a photo that I captured recently and did all the editing steps I described. Just so that I’m not telling you something that’s completely wrong about my real editing process. Take a look at the photo above to see the result of my editing process. The before photo is already cropped though, so that you would be able to seamlessly see the difference with the slider.
Of course, the described process does not apply on every edit that I do. Sometimes I include more settings in my edit, as well as edit the photo quite differently that described.
Double editing
Sometimes I can’t get the desired result from a single edit. It’s mostly due to me wanting to change the flowers colors more than the app allows. That’s when I do double editing.
Recently I edited a photo with pink Japanese anemone flowers.
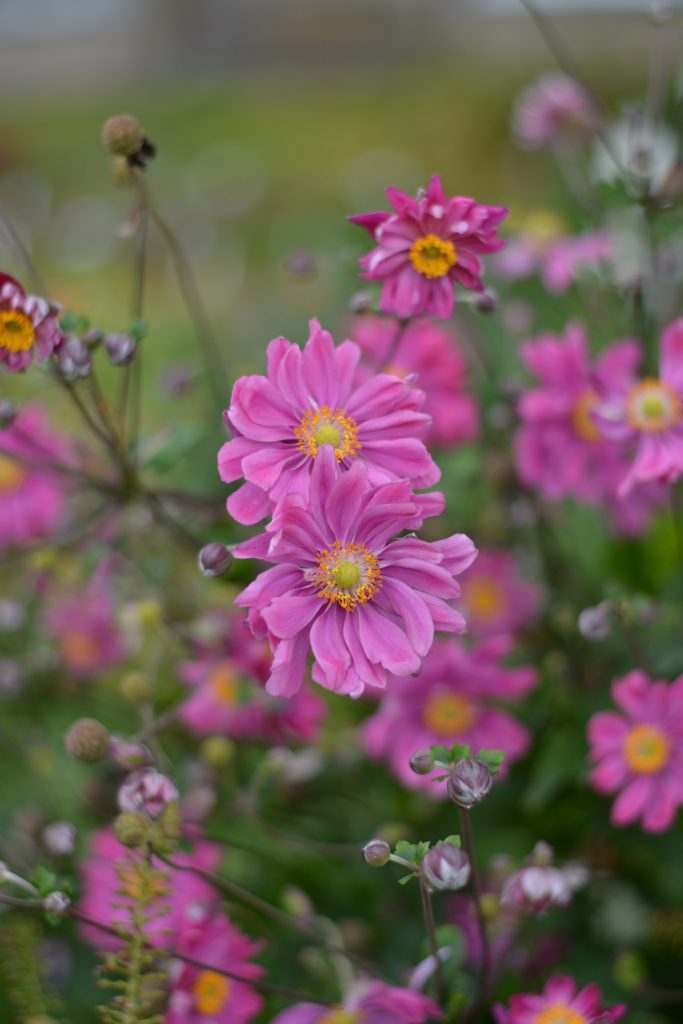
Since (as I’m writing this blog post) I have my blue theme running and it’s a while until my next pink theme, I wanted to make the flowers blue.
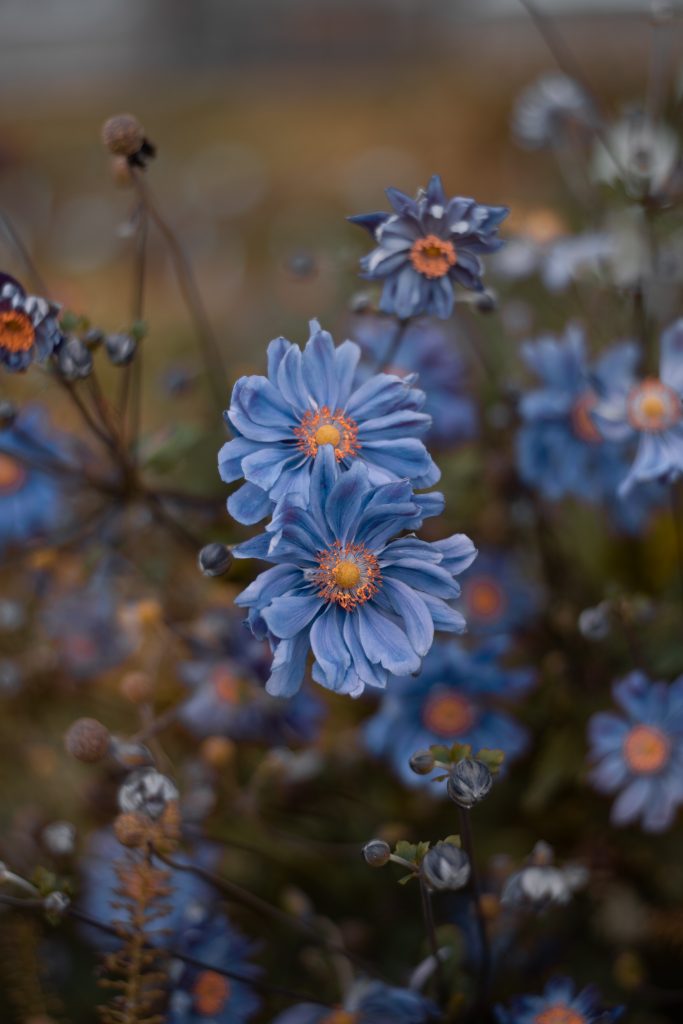
But I wasn’t satisfied with the final result, so I exported the photo, imported it back in Lightroom and continued the edit without all the previous edits dragging along. After the re-import, I applied a preset on top of my already-edited photo and made some more adjustments. Only then I was satisfied with the resulting tones.

PicsArt and Lens Distortions
Besides Adobe Lightroom, PicsArt (and sometimes Lens Distortions) is my second most used app in editing. I like to apply overlays on my photos (bokeh, dust, light). PicsArt allows me to use the apps built-in overlays, add overlays using a brush, or even import my own downloaded photo as an overlay.
Continuing the topic about the Japanese anemone flower that I edited, I added some bokeh overlay that I have downloaded – on it.

PicsArt allow me to not only apply the overlay, but also to modify the overlayed photo itself (change hue, alter shadows and highlights, etc) and delete it from the parts I don’t want it on.
Editing tips from me
Since I have been around cameras and editing for a while, I have learned a few things that I can suggest you.
Shoot RAW
I can only repeat myself once again – I highly suggest you to capture your photos in RAW format. I have the setting to capture both JPEG and RAW set on, so that I can go through the JPEG versions quickly to understand which RAWs I want to edit.
While on everyday basis you might think that there’s not much difference between editing a RAW photo and a JPEG one, you will notice it when the photo (or parts of the photo) are slightly too bright or dark. You can bring up the shadows very nicely when editing RAW. And you can recover the lost detail in the bright areas of the photo. Often I shoot something in the shadow, then notice an insect on the top of the flower, and just shot without changing the settings. I’m happy I got the shot, because the insect (or animal) quickly after that fled away. When looking at the photos, I’m disappointed, because they have completely white areas. But hold on – I shot in RAW, so all of that (well, most) is recoverable!


Could you have imagined that such photo would end up in Instagram? I wouldn’t either. But thanks to RAW – nobody suspects a thing. Except you since you’re reading this. But that will be our secret, right? ?
When you’re not completely satisfied with the edit
If sometimes you are not feeling confident about the edit – leave it until the next day (this applies on Lightroom where you can quit without saving the edit). Maybe when looking at the started edit the next day you have some different ideas or know how you want to edit it. Or maybe you feel like it looks just right when looking at it with a fresh mind. As I mentioned before, I often edit my photos over the course of multiple days.
When you don’t know how to edit a photo
If you don’t know how to edit a photo, try on some presets. You might find some preset that gives a really nice look to your photo. I have lots of photos sitting in Lightroom without an edit, because I don’t know the vibe I want to achieve with it. Sometimes going through all my saved presets help.
The Don’t-s
When editing your photos – don’t over-edit. Don’t oversaturate, don’t oversharpen. Often I’ve seen people adding too much clarity, too much contrast, or too much softness to a photo, and I can say right away that it does not look good. Including blurring the photo too much (unless you do it flawlessly). Unless your goal with the edit is to create artistic picture, you should aim to enhance your photo with your edit to make it still look somewhat natural, but better.
Remove the distractions
In case you capture a photo forgetting about the surroundings of your picture – you don’t need to throw the photo out. You can still get rid of some leaves or branches that don’t fit in the photo. It’s possible to remove the unnecessary and distracting objects for a cleaner photo. You can do that using Snapseed, Adobe Lightroom (clone and heal tool) and PicsArt (manual cloning).
How to find your editing style
When talking about the Instagram feed’s consistency, as I’ve mentioned in How to organize your Instagram feed blog post – often the uniting factor is the way of editing your photos. In my case it’s the color though, since I like to use very different edits in my photos.
To find your style, I can suggest you to experiment and try many different editing styles. Search for inspiration in Instagram and see what you like and what you would like to achieve. My own style have changed time over time. A photo I edited a year ago is different from a photo I edit now – I find new things, new styles that I try and like, and keep onto them.
Conclusion
The thing about editing is – you always learn something new (well, until you master it all). And your style will change over time. Mine has, and I’m still learning new practices on editing too. When I started editing, I edited my photos on pre-made filters in Snapseed. I then grew to start using Lightroom, and only this year learned more deeply about other settings such as Curves, Split toning and some others. Adobe Lightroom’s new “Discover” section allowed me to save other user’s edits, see what they changed and how each change affected the image. This helped me learn about the impact of each setting more.
This year I also learned better to create edits and presets from scratch. This means not using any preset as a base, rather than creating the edit as my own preset. And I shared my presets with you in my Spring vibes preset pack (which is now available to download for free) and the recently released Fall preset pack.
One response to “How I edit photos for my Instagram”