
If you’re like me, you want to protect your photos when you post them on Instagram – to do that, I add a self-made watermark on my photos. I used to export my photos and add the watermark through another application, as I’ve mentioned in another blog post of mine. As of last month (October 2020), you now can add not only textual watermarks to your photos through Adobe Lightroom mobile, but graphical ones too. That means you can create your own logo and place it on your photo before exporting via Lightroom. Sounds easy? Well, because it is!
TABLE OF CONTENTS
The steps to follow to add a graphical watermark in Lightroom
1. Update your application if you haven’t. The new Graphical Watermark feature was introduced in version 6.0 (October 2020 release)
2. Open up the sharing menu by either selecting multiple photos and tapping share, or opening a single photo and tapping the share icon 
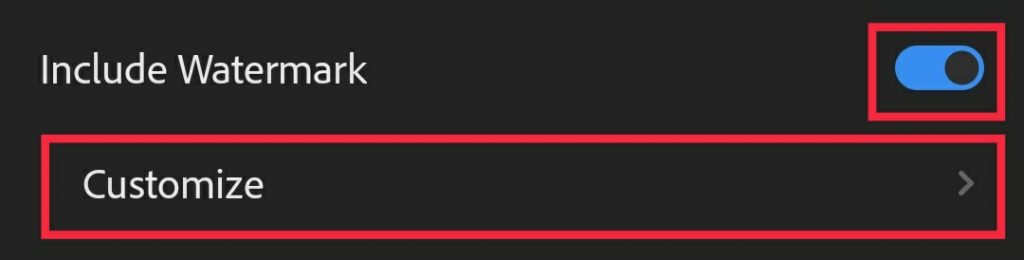
3. From this window you can access the watermark settings in two methods: by tapping on the gear icon, or tapping on Export as. In the following window toggle on Include Watermark and tap on Customize

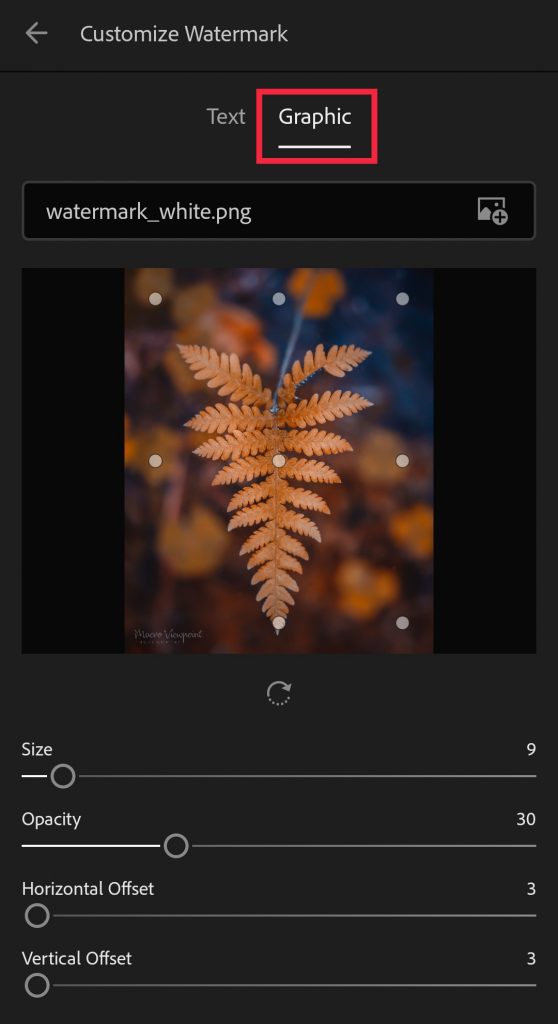
4. You will be introduced with a watermark customization window you might have already seen. If you tap on Graphical, you’ll see the newly added feature. By tapping on the (+) folder icon, you can choose the file you want to use as your watermark. That should be a png photo with transparent background that you have already created and stored on your device.
Changing watermark settings
You can alter the following settings of your watermark:
Placement – by tapping on any of the 9 dots, you can choose a starting position of your watermark
Rotate your watermark by tapping the rotate icon under the image
Size will scale your watermark larger or smaller
Opacity will make your watermark more or less transparent. I usually use very transparent watermark, so that it’s not as distracting
Horizontal offset and Vertical offset will alter how close to each side your watermark is. These options may be unavailable if you’re choosing centered placement for one of the directions. If your starting point is a corner, you can place your watermark anywhere on the image by changing these two settings.
Once you have finished making your changes, tap on the arrow in top left corner to close this window (no saving is needed) and finish exporting your photo. You should have a photo in your gallery that has your watermark on. The settings you chose for your watermark will be used for all your exports while the “Include watermark” option is turned on. If you wish to save a photo without watermark – simply toggle the setting off. Don’t worry, your settings won’t be deleted and you can always toggle it back on to use your chosen watermark and settings.
Conclusion
It’s just that easy. While I previously used “Save to device” button to export my photos, I have now switched to using the “Export as” button, so that I can choose whether I want to include the watermark or not.
This feature has also saved my time, since I edit my photos in Lightroom mobile and had to add the watermark in another application. As you might know from my blog post How I Edit Photos For My Instagram – I sometimes edit my photos in PicsArt or Lens Distortions after Lightroom. Unless I need to do that, the watermark now will be added to my photos while exporting the edit.
I’m so grateful for Adobe adding this, as well as many other new features to recent Adobe Lightroom mobile versions. The graphical watermark feature in Lightroom mobile was something I wanted to have for a while.