
Are you new to Instagram Reels and are not sure where to start, so you’re looking for Reel tips? Or maybe you’re an experienced user looking for some fresh ideas and tips to take your Reels to the next level? Either way, you’ve come to the right place! In this post, I’ll give you a complete beginner’s guide to Instagram Reels, including everything you need to know to get started and create engaging and entertaining content that your followers will love. I’ll also share some advanced tips and tricks to help you stand out from the crowd and grow your audience on the platform. In the end, I will share 7 unique reel ideas that you can utilize with your own content. So, let’s dive in and learn everything you need to know about Instagram Reels!
TABLE OF CONTENTS
What even is a Reel?
“Reel” is the name of the short vertical video format on Instagram. The videos could be anything, starting from dances and videos of yourself. Or even a video of the beautiful sunset you saw yesterday! They can even be a compilation of photos from your own gallery that change with the rhythm of the music. This one seems to be very popular amongst photography pages, which I will talk about more.
How short is “short”? A reel can even be 1s long! If you manage to include everything you want within this timeframe, that’s absolutely fine. But on average I have seen most reels with the length varying from 5 to 15 seconds. The maximum length you can currently use is 90 seconds.
Why should I make Reels if I am a photographer?
That’s a totally fair question. Photographers create photos. Why should they start making videos now?
Reels are a great way to reach new audiences. There are people who like to see only photo content in their home feed. Then there are those who prioritize video content. And there are also people in-between.
Instagram is idolizing TikTok, a popular video-only platform. That’s why lately Instagram is pushing videos more and more toward people. This means – even for people who didn’t watch video format posts, their home feed is now also filled with reels. And that’s where you come in!
Your goal probably is to reach more people with what you create, right? Instagram is giving you a chance right now! By creating video content, you have a chance to be seen by those who don’t browse photo content as much. To have your content pushed towards new audiences. Or to simply show a different kind of content to the people who like photos.
There are times when my photo posts aren’t really doing so well while my reel posts are skyrocketing and reaching new people even a month after posting. This is a good reason to try out all the post formats before saying no.
Most important Reel tips and rules to follow to create viral content
To make a reel do good, it actually has to BE good! Here are my top Reel tips with rules a Reel should follow to have a better chance of doing great.
Reel tip #1 – No black borders
You might think that you can simply add your photos as they are and publish the reel. NO! You should never add photos that are not in the same aspect ratio as the reel. This can result in bad-quality video and uninviting black borders.
Crop your photos to a 9:16 aspect ratio. This is the ratio that Instagram reels are published in. Your goal is to create the most immersive experience possible. That means full-screen content!
But how can I get a 9:16 crop from a 4:5 photo, or even a landscape photo?
You might be asking
Here are some options.
Ways to get a 9:16 crop: Crop in
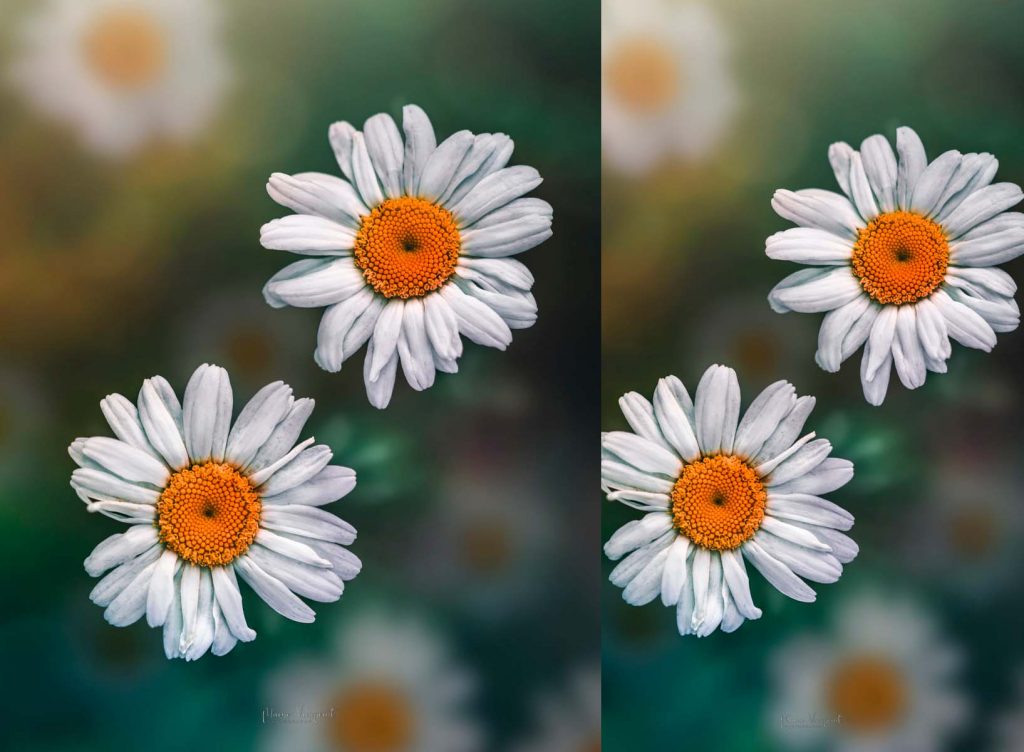
The easiest option is to simply crop in your photo. But there is a disadvantage to this. The photo will lose a lot of information that was on the sides. And your photo will be much more zoomed in.
Here is an example of a photo of mine where a 9:16 crop led me to crop off fragments of the flowers:
A tip for acquiring a 9:16 crop is exporting the photo in full size without the 4:5 crop before cropping for Instagram. Then you can get both the 4:5 crop as well as the 9:16 crop from the uncropped photo.
Here are the rules I follow to be able to crop both aspect ratios.
- When editing in Lightroom, always export an uncropped version to Photoshop
- Never crop in while editing in Photoshop
- Expand if you rotate the photo, and fill the remaining area
- Always export an uncropped photo back to Lightroom
Having the final photo in Lightroom gives you the flexibility to have different crops. Save them as different versions if you want to. That is a feature in Lightroom I love! Don’t forget that in Lightroom you can always change the edit. That means – a cropped photo can be altered to a different crop. I always crop my photos in Lightroom both for my feed, as well as for reels.
Ways to get a 9:16 crop: Expand
If you don’t have a taller version of the photo, or if the photo is a portrait crop of a horizontal photo – expand it! I too have such photos I sometimes include in my reels. Why’s that? I started editing non-destructively and importing an uncropped photo back into Lightroom only at the end of 2020. All my edits before that – are strictly in a 4:5 aspect ratio, and there is no wider scene. If only I could have told myself this earlier: never crop in and save if you can’t go back and change it. Another reason why I still expand to post a photo in a reel is if my photo was captured in a landscape format (horizontally). While I shoot most of my photos in portrait mode (vertically), there are still some that are horizontal.
Here is an example of me expanding a photo to fit it into a 9:16 aspect ratio. I expanded the top and added some soft light to make it look natural:

You can learn how to expand photos in this blog post (tap to open). If you need to rotate the photo while expanding, I have shared how I did that in this Patreon post (tap to open).
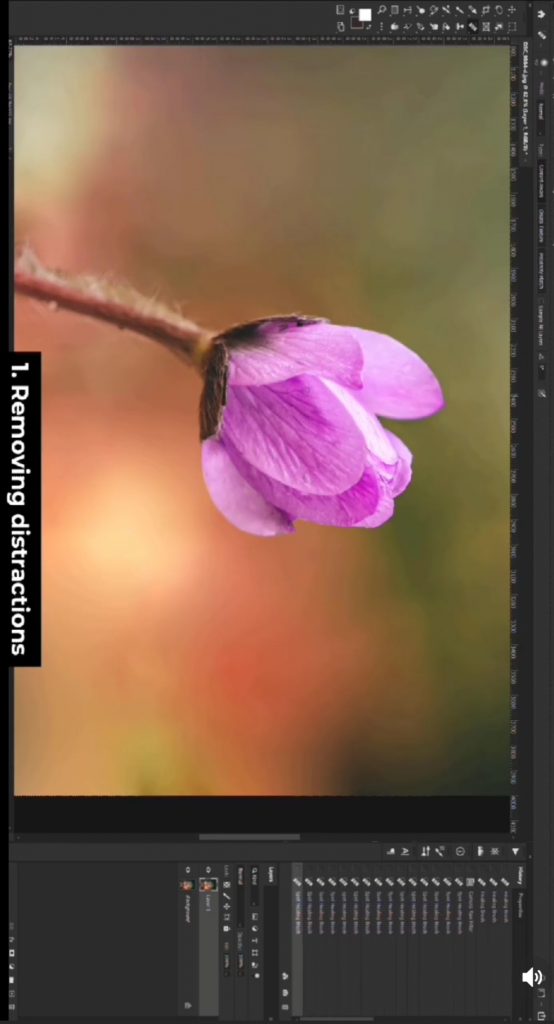
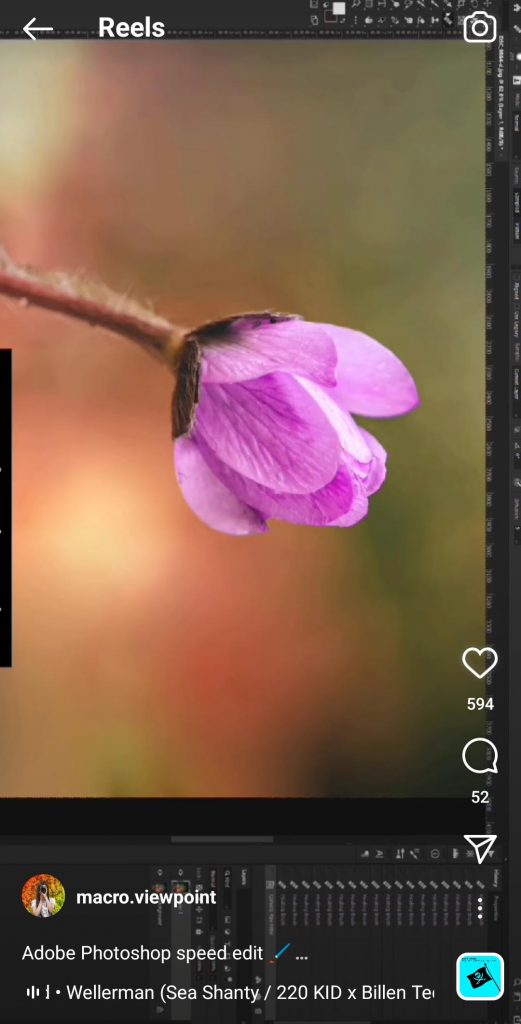
Ways to get a 9:16 crop: Add a border that isn’t black
If you don’t want to expand, and also don’t want to crop in, there is another option. Do add a bother, but not a black one.
A way I have done this is to place the same flower in the background and blurred it. I do this in Photoshop, but the PicsArt application also has such feature called “Fit”.
Here is an example of my reel when I used this technique:

A reel with such a photo will feel much more full-screen than one with black borders.
Ways to get a 9:16 crop: Add multiple photos in one scene
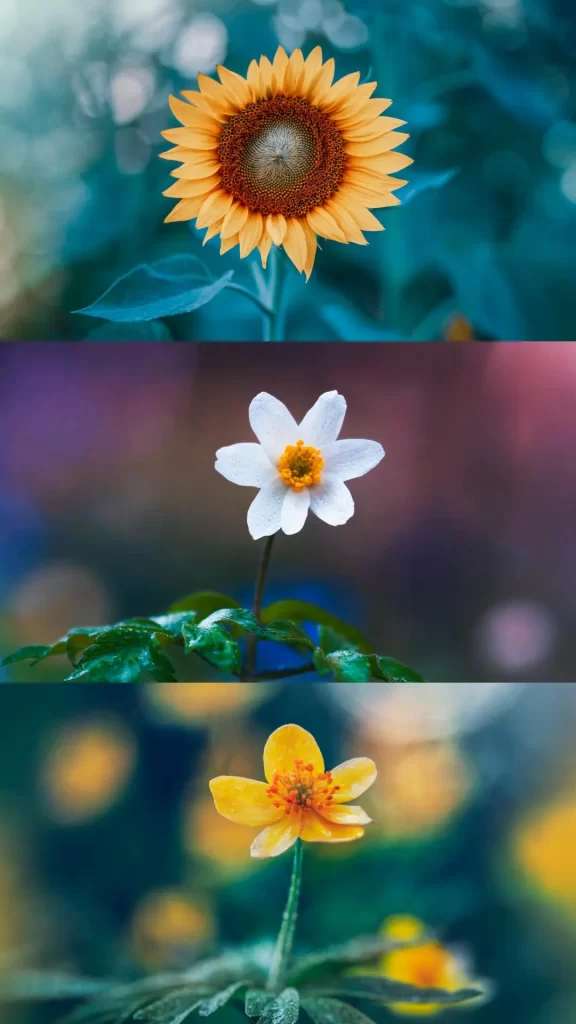
If you have horizontal content, you can make a collage of multiple photos in one scene. The Instagram story provides such a feature with the Layout option.
Here is a look at how you can arrange multiple photos in one 9:16 photo to use for a reel:
Reel tip #2 – Make the photos sync
When creating a reel with content that changes, it is important to sync them. If the content changes with the beat, it makes a much more satisfying reel to watch, and people will want to share it more too! But how can you do that?
1. Download a reel you are recreating
“You can download reels?” – Absolutely!
Use a website such as igdownloader, downloadgram, saveinsta, or any other similar website. Copy the reel’s link and paste it into the website. Hit enter and download it! There, you now have the reel on your phone/computer.
Now what?
2. Use the video as an audio source
Use it as audio! For mobile apps, there should be an option to add an audio source that is extracted from a video.
Here’s an example of the feature in the CapCut mobile application:

Alternatively, if you edit on a computer, add the video on the lowest layer and place your content on a layer above it.
Now that you have the audio added, another thing appeared – an audio chart. This tells you how the sounds change, and quite often you can see the beat from the audio, such as in this CapCut example below.


Sync it!
Now that you have the audio chart, you can use it to guide yourself on the beat. Some audios make it easy to notice the beat, such as the CapCut video example. But some – not as easy – like the one I used in Premiere Pro.
If the beat is easily visible, make the photos change as the beats change. That means – at the peak. Take a look at the two photos I shared before to see how I created my video.
But if you cannot see the beat that well – play it and listen. As you hear the beat, stop the video and make a cut there.
For audio when you can’t feel the beat that well, I suggest switching to your computer. Using computer video editing software and a mouse gives you an advantage of precision.
I use Premiere Pro to create most of my reels. It has a feature of previewing the video 5 times slower (hold down K+L to do this). I use the feature a lot to make sure the photos change exactly as the beat changes.
Listen to your video before exporting. For mobile devices, you might need to export and then listen to it as sometimes the apps lag while doing so. But the main point of this is – to make sure it is as perfectly synced as possible!
Use the “Use audio” button to create a reel
Don’t use the + button to create a new reel. If you are recreating somebody else’s reel, here is how you should approach it:
- Open the reel you are recreating
- Tap on the audio at the bottom of your screen
- Tap “Use audio” at the top of your screen (see the photo below)
- Import your video
- Mute the original audio (this should happen automatically)
- Watch the preview to make sure it sounds synced.

Why this approach? You used this reel as the source for the audio and synced your video to this exact fragment. By using the “Use audio”, you are choosing that exact fragment of the audio. You don’t need to look for it and hope it’s the same one. Instagram already does it for you!
The audio doesn’t match the one I created the video with
A problem you might be having
Take this in mind. Sometimes people leave the Instagram music to 1% and add their own audio over, which is the one you hear. If you tap on the audio and you hear a different fragment of the song playing – you won’t be able to use this audio. BUT! You can use the exact same technique. Leave your video’s audio as the one for everyone to hear, and turn Instagram’s audio down to 1%.
Reel tip #3 – No important content in these areas
Don’t add any important text or content in these areas!

“Why?” – you are asking.
The first reason is: there are overlays on the top, bottom, and lower-right sides. Those are the navigation, the likes, comments, sharing, and your caption. If you add important elements in these areas, the viewer won’t be able to read them without pausing the reel. Especially if the content changes in those areas often during the reel.
And the second reason: The reel gets cropped in! That’s right – the sides of the video are cropped off for viewers with taller screens. This is done to be able to fill more of the screen with content.
I have a couple of examples from my own feed where these issues can be seen.
Examples of my reels not following this Reel tip
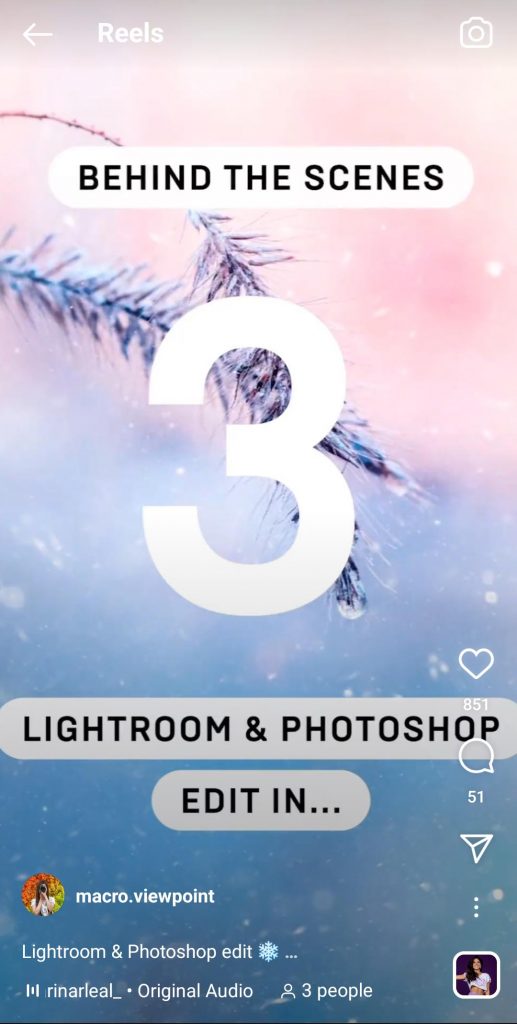
Here you can see that the bottom text cannot be read unless the user taps and hold the finger to pause the video:

There is one reason why adding text in this area could benefit you though. This makes the user pause the reel to read the text, therefore spending longer time on your page. But don’t add text that changes frequently in the area as that will annoy your viewers, and they will simply scroll away.
Here is another example of why parts of the text shouldn’t be near the sides:
It got cropped in! And the text loses aestheticism instantly as it does not fully fit in the viewer’s screen.
Another final example where a text I added got fully removed:
I learned my lesson after seeing how badly my video was treated on my screen. Now I double-check if I haven’t added something too close to the sides before posting.
Reel tip #4 – Use transitions when needed
People like twists. A reel with photos casually changing can get boring really fast. That’s where transition effects come in! One second in the video, you instantly got the attention of the viewer. It could be a photo jumping or a 3D effect added to a photo. These make the viewer look for longer as there is something that actually moves as the photo changes!
A great option for adding animations is the mobile application CapCut. When you see an animation in my reel, 90% of the time I added it with this app.
Some of my most viral reels have had the photos changing with an animation. Particularly – a jumping photo animation (sometimes called “Jumping Gallery”).
To create one like that:
- Create a landscape video with story-format photos that are rotated 90 degrees
- When choosing the animation, tap on the “Pendulum”
- In the end, rotate your exported video back to the story ratio, and you’re all set!
Here is how such a reel looks on the CapCut application as I was creating it:

Reel tip #5 – Make your reels more interesting
If transitions aren’t your thing, you can add spark to your videos another way. Through overlays! They can revive a static photo, adding a new point of interest for the viewer. It could be snowfall in a winter photo. Or maybe magical sparkles on a golden hour photo. Or anything else your imagination craves.
I download overlays from Pixabay. They’re all royalty-free and can be used for your videos right away. Another option is to choose built-in overlays that applications such as CapCut offer. That’s what I did for this reel, reviving a static photo. I also added a zoom animation to simulate a pulsating/breathing photo.
There is one rule to follow though. Don’t overdo overlays! It’s easy to add an overlay that doesn’t fit the photo and drives the attention away from your main subject – the photo.
Reel tip #6 – Make your reels catchy
Make your reels catchy. Did you know that it takes just a second or two for a user to determine if they want to watch the reel or not? When swiping through the reels section, the first impression is the most important. The reel tip is – to start with something interesting, or with a hook to keep the viewers watching. Perhaps share that something worth waiting for will be revealed at the end of the video.
Another option is to make sure something changes in the video within a couple of seconds. People lose their attention quickly. A video where every couple of seconds their attention is refreshed tends to do better.
Reel tip #7 – Don’t forget about the cover
A reel cover is a photo that appears in your feed before it is tapped on. It’s important to choose the right photo to use as a cover.
I have guidelines a cover photo should follow:
1. Do prepare or choose a cover. You should never post a reel with the auto-selected cover. Use the Edit cover button to either choose fragment of the video or upload your own photo

2. Choose something eye-catching. This will make users want to open it up and watch it
3. Choose the best fragment that represents your reel the most, or upload a photo from your gallery
4. Add text if possible. With text, you can explain what’s in the reel to viewers who aren’t sure if they want to watch it or not. Just make sure the text can be read in the small grid on your profile
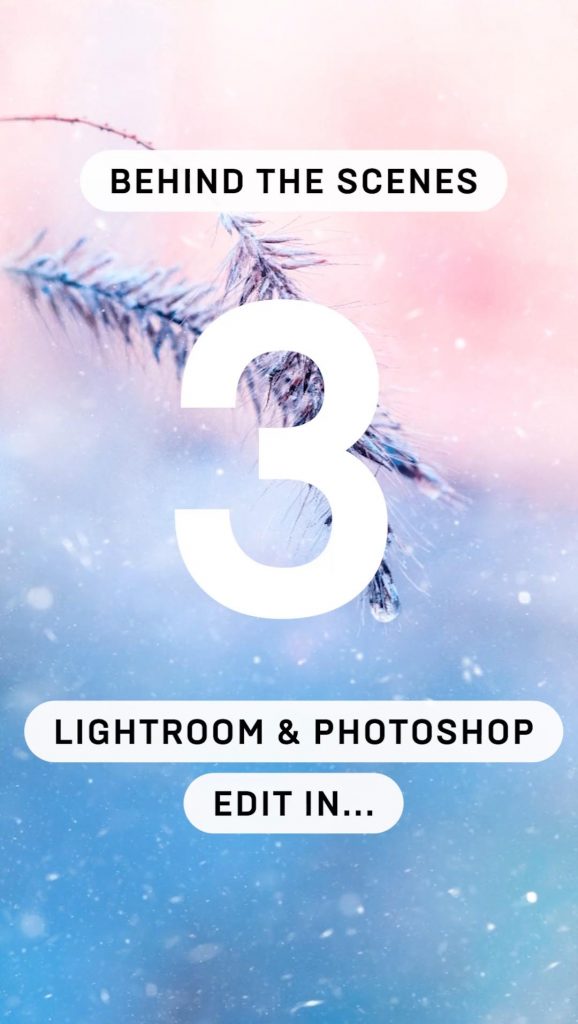
Here is how I now prepare my reel cover photos with the text for every reel:

5. A cover photo should be related to the content of the reel. Don’t add misleading covers that show something that is not in your reel
6. Crop profile image! When you tap on “Edit cover”, you will see a “Crop profile image” option. This is where you can reposition your cover photo so that the most important parts fit into the square thumbnail that will be visible in your feed

Reel tip #8 – Add the reel to your feed
Always, I repeat, always add your new reel to your feed! Following this Reel tip and having your new reel appear in your feed will increase your reach and watch counts so much! And your followers will be able to spot it quickly. If you don’t add your new reel to your feed, only those who happen to see the reel on the home page or tap on the “Reels” tab in your profile will see them. Meanwhile, when you add it to your feed, every new visitor will see it and will probably watch it.
“But it will ruin my beautifully curated feed!”
“But I don’t want the reel to be there when I post more content!”
It won’t!
The reel can be removed from your profile any time you feel like saying goodbye to it.
How to remove a reel from your Instagram profile grid?
Tap on the three dots on a reel and you will see the “Remove from profile grid” option.

That’s how you can clean up your Instagram feed from reels.
After you remove the reel from your feed, you can always add it back. Here’s how to add a removed reel back into your Instagram feed:
1. Simply locate your reel and tap on the three dots
2. Choose Manage your reel and
3. Choose Add to profile grid.
This way it will get added back to where it was before you removed the reel from your Instagram feed.
What applications to use to create a reel?
I have tried out various applications for creating reels – both on mobile as well as on a computer. Here’s a list of them all:
1. CapCut – my go-to application for creating reels on my phone.
2. VN – a mobile application
3. InShot – a mobile application
4. HitFilm Express – a free computer program. This is what I started with to create reels on my computer
5. Adobe Premiere Pro – my go-to application for creating reels on my computer
Some ideas for Instagram Reels as a photographer
You might be curious about how can you create video content as a photographer. “All I have is photos!”. Here are some ideas you can use to create your own reel content.
Reel idea #1 – A photo compilation
One of the most popular kinds of reel amongst photographers. A compilation of your photos. They can be all fitting to one theme, for example, insects, pink flowers, golden hour, etc. They can also be your most recent work or simply your favorite photos.
To create such a reel – you choose the audio and add your photos that change with the rhythm. Sounds pretty simple, although to get the timing right – it can be a challenge. You can add animations in between photos, add video instead of a photo, and so much more.
Reel idea #2 – Behind the scenes video
Using reels to share more about how a photo was taken or how the scenery looked is definitely something your followers will be interested in.
This could be a video of the location and the final photo after it. Or a video of your camera photographing the photo with the revealed finished piece. I call this last one “The spot VS the shot”. Another way to call such reels could be “What my phone sees VS my camera” as the “behind the scenes” part is captured with a phone while the final piece is shot with your camera.
Reel idea #3 – Before & after
Another way to show more of “behind the finished photo” is by showing an unedited photo, and then – the edited one. This is a popular type of reel in my profile too. Editing is a big aspect of my final work, and there definitely are very big differences in some of my photos when comparing the unedited and the finished photos.
Reel idea #4 – Black and white VS color
If your photos are all about color – this reel idea definitely is for you. This idea means you share your photo in black and white and then reveal the true colors of it. It’s a fun way to make the viewers guess what the real color of the photo is going to be. Or you can simply accent the colors better by showing a black-and-white photo first.
I usually combine this idea with multiple photos revealing one by one, following the beat of the music.
Reel idea #5 – A single photo
Sometimes you don’t need to think much to create content. The reel can simply be a photo with music playing in the background. To make this reel more interesting, you can add some movement to the photo. That can be a pulsating/breathing kind of animation of the photo itself. Or you can add an overlay such as sparkles, rain, or snow.
Reel idea #6 – A video
If you also film some videos besides capturing photos – those can serve as content too! I film insects and flowers moving in the wind. A slow-mo video of a bee flying is perfect content for a calm reel in my Instagram profile. Share a single video or combine multiple ones in a single reel – there are many possibilities.
Reel idea #7 – An audio template
Lots and lots of audio already explain what kind of content should be shared with it. For example – sharing your best purchase, showing your favorites (photos, products, locations, …), sharing a photo as a reel, and another photo as a reel here, and sharing information about you with your followers. Tap on each title to view a reel from my page used with it. These audios are a great way to add some uniqueness to otherwise usual reels. Every once in a while as I spot some new ones – I save them to a collection of “Reel ideas”.
How I create Instagram Reels – a video example
You can access a video where I show my process of creating an Instagram reel with the Capcut mobile application.
To access it, head to my Patreon. The video is available to every Patron of mine, which you can become for just a dollar a month.
Conclusion
Instagram Reels provide photographers with a wonderful opportunity to showcase their work and reach a wider audience. By following essential Reel tips like preparing the images, syncing with the beat, and using eye-catching transitions, photographers can create engaging and viral Reels.
Adding overlays and intriguing animations can revitalize static photos while choosing the right cover photo is crucial for attracting viewers. Don’t forget about adding your Reels to your feed to increase visibility.
As a photographer, you have numerous content ideas at your disposal, from photo compilations and behind-the-scenes insights to before-and-after transformations and color transitions.
Embrace the possibilities of Instagram Reels to elevate your photography and captivate your audience in unique and exciting ways. Happy creating!