
You’ve purchased or downloaded Lightroom presets, but aren’t sure how to install Lightroom presets on your device? I’m here to assist you and guide you through all the steps on how to install Lightroom presets on your mobile phone or computer.
While editing photos, I often use Lightroom presets for inspiration on learning how to edit the photo myself or as a base for my edit. I use both downloaded presets made by other people and self-made presets from settings that I use often.
If you’re new to Lightroom or Photoshop, this tutorial on how to install Lightroom presets should help you out.
TABLE OF CONTENTS
How to install Lightroom presets on Lightroom Mobile
For mobile Lightroom preset installation, you can use any of the following:
- A .DNG preset file – it’s a photo with the settings applied to it in a single file
- An .XMP file – it’s a file containing only the settings
- A .zip file with XMP files in it – a single file containing all of the presets.
I’ll guide you through all three importing methods.
How to import .XMP or .zip presets on Lightroom mobile?
Follow these steps:
1. Open any photo
2. Tap on the Presets tab

3. Tap on the three dots in the top-right corner

4. Select Import presets

5. Select the .XMP or .zip file you want to import
6. A new preset group should now appear with the presets you imported
How to import .DNG presets on Lightroom mobile?
To import the preset:
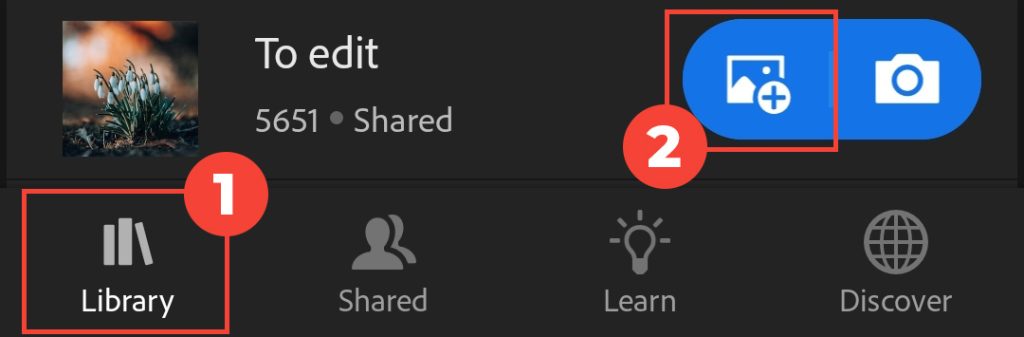
- While in the Library tab, Import the file as a photo in your application by locating the “+” icon at the bottom of your phone’s screen
2. Once the file is imported – it acts as a RAW photo with the settings already applied to it. Open the photo in the editing view
3. Locate Presets tab

4. Tap on the three dots on the top row to open up the menu

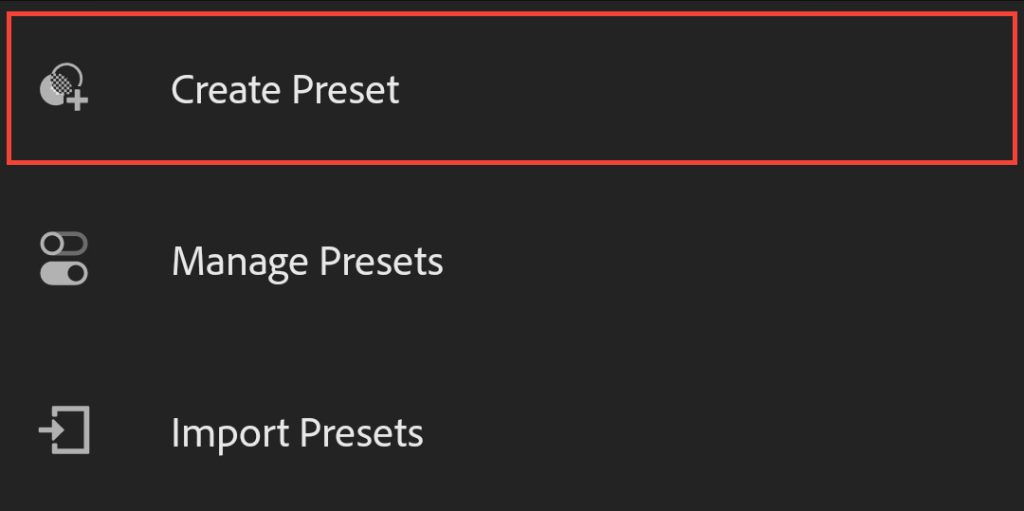
5. Choose the Create preset option
6. Check all the settings you want the preset to store. If the preset uses selective adjustments – don’t forget to check “Masking” as well

7. Name your preset. Since it’s a raw file with settings – there is no preset name stored, so you have to type it in yourself. You can find the names of my presets written on the .DNG file.
8. If this preset is from a new preset pack, tap on the Preset group and choose to Create New Preset Group. Name the preset group as the preset pack is named, for example, “Macro Viewpoint: Creative Mood”.
9. Tap on the check icon at the top right corner and you’re all set. You should now have a new preset under the “Users presets” group (or another if you changed it)
10. Use the preset on your own photos.
Take in mind that if you have the free version of Lightroom Mobile then, when applying a preset, the selective edits won’t be applied to your photo, since it’s a paid feature.
If you have an Adobe account connected to the Lightroom mobile application, and you have the Lightroom application on your computer – the preset will synchronize and appear available on your desktop as well.
How to install Lightroom presets on Lightroom CC (desktop)
To install desktop Lightroom presets, you need to have a file with a .XMP extension. It’s a file that stores only the settings.
If you have downloaded my presets, you will have to extract the files since they are compressed in a .zip format.
Installing presets in Lightroom CC is easy:
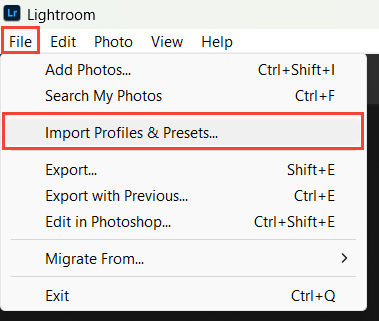
1. Go to File -> Import Profiles and Presets…
Alternatively with a photo to be edited opened and the Presets panel open, click on the + icon and choose Import Presets…

2. Locate the folder with the presets you want to import
3. Select all the presets or the .zip file and choose Import
4. The presets will be installed, and you will find them in the preset list
When installing a whole preset pack, the presets should appear in a new preset group.
If you have an Adobe account connected to the Lightroom CC, and you have Lightroom mobile on your phone – the presets will synchronize and appear available on your phone or tablet as well.
How to install Lightroom presets on Lightroom Classic CC (desktop)
To install the presets in your Lightroom Classic on your desktop, follow these steps:

- Click on the “+” icon while in Develop mode and click on Import presets…
- Locate the folder with the presets you want to import
- Select all the presets and choose Import
- The presets will be installed, and you will find them in the preset list.
Note that presets loaded into Lightroom Classic won’t be synchronized to your Lightroom CC program and Lightroom mobile. To have the presets from your Lightroom Classic to be synchronized to your phone, you need to import them into the CC application.
How to install Lightroom presets on Adobe Photoshop Camera RAW
You can also use Lightroom presets with Photoshop. To install them, follow these steps:
1. Navigate to Filter -> Camera RAW Filter…

2. Select the three-dot menu and choose Import Profiles & Presets…

3. Select the .XMP or .zip file you want to import
4. A new preset group should now appear with the presets you imported