
Seeing all the popular Instagram profiles, you get jealous. You want your Instagram account to be popular and reach a large audience that will choose to follow your work. But how to achieve that? To grow your Instagram account and increase its visibility, you need to focus on both your account and your actions. Read further to view the most important steps in my opinion on growing your Instagram account in 2026.
TABLE OF CONTENTS
What NOT to do to grow an account
Before I start with good practices and techniques on how to grow your Instagram account, I want to share some “don’ts”.
Don’t ask for follows, likes, and comments
Doing this will make the user lose any respect for you. You want them to WANT to do those things; only then will these gained followers matter and will work in the long term.
I receive people begging me to follow them way too often. A lot of people also ask for “follow for follow”.
What is follow-for-follow? It’s when you follow a person just because you want them to follow you back. Or agreeing to follow a person only if they follow you back.
You might think that doing follow-for-follow is a nice way of growing your follower count. Actually, yes, it does grow your follower count, no lying there. But the problem lies in the fact that the followers you get might not even be active followers, as they didn’t decide to follow you themselves.
Let’s say – a user follows you. Unless they were actually interested in your content, they might unfollow you later or interact with your content rarely or even never. Such followers who don’t interact with your content are called ghost followers, and they harm your account more than they do some good. In fact, there might be a lot of followers who follow you, but haven’t ever liked or commented on any of your photos. Their only goal was to gain a follow-back.
To read more about why inactive followers are bad for your account, and why you shouldn’t do Follow-for-Follow, you can read my blog post Why shouldn’t you do Follow-for-Follow in Instagram.
Don’t “post and ghost”
In other words, don’t post and leave the app. At least not when you have a small account.
The interactions made in the first 30 minutes to an hour matter the most for Instagram to decide whether the post is doing well enough to show it to a wider audience. And by leaving the app after posting, you’re simply throwing a photo in the air in hopes of someone seeing it.
I will explain what to do instead, later in this article.
Make your account be seen by reaching new people
To earn more followers, you need people to see or find your account. The more people notice your account, the more people will visit your account and perhaps give you a follow.
I will go through various important aspects that you need to pay attention to in order to be noticed by more people.
Location
Adding location to your photos will help people discover your photos and page. This allows you to be discovered by local people, people who are showing an interest in the location you tagged, or people who simply search the location.
Exposure from stories
Did you know that you can also add a location to your stories? That is a way to get a little more exposure to non-followers. When someone visits a location page, there is also an option to see the stories that have been tagged.
Hashtags and Keywords
Using hashtags when posting content to your Instagram feed is a very important step – it helps you get discovered by new people.
When adding a hashtag to your post, you will be discovered by people who search the keywords used in the hashtag. But the same happens when you use keywords in your caption!
Instagram has changed how hashtags work, from separate hashtag pages to extracting keywords from them and using them in the search. That means you can achieve the same effect through both hashtags and keywords in your caption.
Choosing the right hashtags
You might think that using only hashtags like #flowers #nature #macro is a good practice, but it isn’t always the case. Such hashtags are very general and broad, giving your post very little chance of being seen when searching for them.
However, I am not saying to avoid such hashtags completely. Instead, limit their usage to a couple per post. These tags still can help you be seen if you gain a big enough boost from other smaller hashtags and keywords.
I have experienced cases where my posts gained reach through popular hashtags, primarily due to the support provided by smaller hashtags, which helped the growth.
I suggest using not-so-general hashtags with a more specific category (a tag for a specific flower you’re posting, for example, #snowdrops). They would be more relevant to your picture, and you would get a more targeted audience.
A good practice is to use only a few popular hashtags and split the remaining amount between mid-size and less popular (but more specific) hashtags, so that your post is placed in different ranges of hashtags, giving it a better distribution.
How many hashtags should you use?
The limit for hashtags is 30 per post. Although in 2026 you cannot add more than 5 hashtags in the caption, you can still post the full list of 30 in comments.
I aim to use close to 30 hashtags for a better chance of being seen, as well as a better chance of being featured in feature pages (feature hubs). You can read about feature hubs further.
And yes, I still suggest using all 30 hashtags even though so many have mentioned that it is suggested to use only 5-7 hashtags per post. Even though you don’t see much reach from hashtags, they still help you get discovered when someone searches for a word that is used in the hashtag. For example, if you have used the hashtag #blueflowers – when someone searches “Blue Flowers” on Instagram, your post might just pop up.
Hashtags in the comments or caption?
It doesn’t matter. Both in the caption and in the comments work great. Placing your hashtags in the comments will still allow your post to be discovered by people who search the keywords on Instagram search.
Note that now you can only add a limited number of hashtags in the caption. That means you can post the rest in the comments.
Switch up your hashtags
It is good to switch up your hashtags from time to time. Using the same set of hashtags repeatedly can give a spam signal to Instagram. And that can lead to a reduced reach (in other words, a shadow ban). Another reason to switch up your hashtags is to be discovered by new people, as new hashtags = a new set of people who can spot them.

Organizing your hashtags
If shuffling your hashtags and finding relevant hashtags from your collection all the time is a struggle for you, I have a solution!
Ever since 2018, I have used my own tool where I store and categorize my tags. That way, I can simply choose the fitting categories for my post, click a button, and voila! I have 30 unique and shuffled hashtags ready to be used for my post.
The service is called IgTags, and every Patreon subscriber of mine can access and use it for free.
By subscribing to my Patreon, you not only access the hashtag service to organize your hashtags, but also the editing and Photography tutorials I share there every week.
Feature hubs
A feature hub is an account that has its own hashtag and reposts other people’s photos in their Instagram feed, while crediting each author.
When a feature hub shares your photo, they credit you by tagging you in the photo and/or mentioning your account in the caption. When people visit the account, they might navigate to your account from the featured photo.
The bigger the feature account is, the better the impact will be on your follower growth. But that doesn’t mean that smaller feature hubs don’t work. They still expose your account to a new audience, even though it is not as big.
How to find feature hubs?
There are a couple of options. I will walk you through them all.
Use the search
When you search for a topic such as “macro” on Instagram and navigate to the “users” tab, you will be shown a list of pages of which some will be feature hubs. A great way to distinguish a feature hub is the profile photo – it will most definitely be a logo.

When visiting an account, you can look for various signs that say that it’s a feature hub:
- a hashtag or the word “feature” in the bio
- a congratulation to the featured user in the caption
- a mention of the hashtag to use in the caption.
Visit the “Tagged” feed
Another way to find feature hubs is by navigating to the “Tagged” feed of an account. Those are photos that the user is tagged in.
You have a great chance to spot photos that are features of the user’s work. But there can also be photos of other creators that have simply tagged the user. Keep an eye out for photos that look like the work of the account you have visited. I have found various feature hubs this way, especially when looking for feature accounts when traveling.

How to get featured?
To get featured by a feature hub, you have to either use their provided hashtag or tag them in your photos (every hub has its own rules). Take note that some hubs require you to follow them to be featured.
Feature hubs usually write all the important information and requirements for featuring in their bio or in each photo description.
There are also themed feature hubs that have daily, weekly, or monthly themes (meaning – there is a new hashtag for each theme, which might give you a better chance at being featured). Some of such feature hubs (which I often tag) include graffi_ty, gramoftheday, jjcommunity, nothingisordinary_,. During these daily or weekly themes, if specified, you can even tag all your old photos that match the theme.
Camera and Editing Software pages
Similar to feature hubs, camera brand pages, and editing software pages can have a hashtag you can use to be featured on their page.
For example:
- @alphauniversebysony.eu feature photos taken by Sony cameras when you use #SonyAlpha or tag them in your photos
- @lightroom feature photos edited with Lightroom editing app when you use #MadeWithLightroom
- @adobecreativecloud feature photos created or edited with any Adobe software when you use #MadeWithCC
- @helicon_focus feature photos focus-stacked with Helicon Focus software when you tag them or invite them for a collaboration
With these pages being bigger, you have a smaller chance of being noticed and featured by the page. Though including their hashtag or tagging them regularly in all appropriate posts will give you continuous chances of being spotted by the brand.
The brand noticing you can also lead to a bigger collaboration than just having your post featured.
I’ve been noticed by, and have collaborated with, Nikon, Sony, Adobe, OnePlus, and other brands to create content for them. I’ve photographed macros with the OnePlus brand new phone, captured macro photos with Nikon Z MC 50mm f/2.8 Macro lens, received and used the Sony FE 100mm F2.8 Macro GM OSS lens to create content for Sony, as well as created presets for Adobe Lightroom (which can be found in the Premium section under Spring category).
All these collaborations helped me reach more people, thanks to my content being posted with credit on their page.
Shoutouts
A shout-out is when another person shares your photo or your profile in their story, exposing your account to a new audience. This leads to new profile visitors and potentially new followers.
Many accounts often go from profile to profile, leaving messages that offer to share each other’s accounts for more exposure. If the user agrees, both the sender and receiver will share each other’s accounts in their stories.
When your account is small, shout-outs can really help you to get out there and be seen. And the bigger the account that shares your photo, the better the chance of you earning more new followers.
Where to start with shout-outs?
Don’t go rushing to an account with 10’000+ followers asking for a shout-out, if you have only a few hundred followers. They simply wouldn’t see it worth it.
Try to aim for accounts with a similar follower count to yours so that you both benefit from the shout-out. But please also aim for accounts that have a similar niche to yours. Because if you don’t, the shoutout would expose you to an audience that is not interested in your content at all (and the other way around).
Get the attention of new accounts
Growth requires regular work. And yes, that also means going out and finding people who could follow you.
Your goal is to find users with a similar niche to your account (for example, macro photography).
How to find other users who could follow you?
Search your niche’s keywords (such as “flower photography”) and look through the posts to find people who post similar content to yours.
Find which users tag your favorite feature hubs in their photos. Use the hub’s “Tagged” feed to find them. A chance is – they do it because they want to be seen and will gladly visit your account too!
Accounts that are featured in feature hubs have great potential for a visit too.
Go through the comments of big user posts that are similar to yours. See who posts meaningful comments. And to expand your search to even new horizons – continue this by visiting that user’s comment section and searching for more users. A chance is – you will find lots of new accounts that don’t follow you.
What to do once a user is found?
Visit their account, like some photos, and/or leave meaningful comments under some of their recent posts. Older posts work too if it’s a smaller account. A chance is – they will visit your page. And if you have presented your page well, they might follow you or keep an eye on your profile.
To have a better chance of being noticed, leave comments that add value to the post and would require the author to reply with something more than just a simple “Thank you”. Or at least get curious about who the user is that leaves such meaningful comments.
This is a much better way than asking for a follow-for-follow because the followers you earn will be voluntary, and because they like your page.
Take in mind that the user might not see your interactions if they have left Instagram, and many other actions happened on their page, overwriting your notifications. I suggest doing these actions soon after the user has posted something, or returning and repeating this multiple times with other photos they post.
You can also get users’ attention by reacting or replying to their Instagram stories – this way, they will definitely receive the notification in their messaging requests.
Sometimes, being friendly can also earn a follower. I sometimes don’t respond with a follow-back right away. However, when I start to connect with the user, chat regularly, or simply have good interactions, I feel closer to them, and that may lead me to start following their account as well.
Get the attention of your own followers
Did you know that only 10% of your followers see your post when you share it? Instagram doesn’t show your new post to all of your followers, only a small part of them. Instagram chooses to show it to more people only if the post did well (you got great engagement in the first hour after posting).
How does Instagram choose whom to show your content to? It’s the people who interact with your content the most, or who would be interested to see it. That’s why it is important to connect with your own audience, as they’re the ones who give all the love to your content before it reaches a wider audience of people who don’t follow you yet.
Connect with your followers
You can define if a user will see your content by building a relationship.
Here are actions that build the relationship:
- The user interacting with your content (stories, posts)
Liking, commenting, and saving posts. Viewing and liking stories and interacting with the stickers - Direct messages between you and the user. Those can be replies to stories or any messages you simply send back and forth
- Adding to Close friends or Favorites: if a user adds you to one of these lists, they will see your content higher on their feed
Instagram’s algorithm orders the posts by showing the ones by your close friends, favorites, and posts you might be interested in first.
When I open Instagram and the posts reload, the first ones usually are the people whose content I often like and comment on more frequently.
If you want people around you to regularly leave some love on your work, it has to go both ways. Reply to the comments, visit their profile, and leave something there as well (doesn’t always have to be a comment).
Make the users see that you appreciate the comments and want to keep connecting with them!
An example from my experience – I just love the content of a user “X” that is a smaller account than mine. I leave some love on their work with a valuable comment, but all I get in return is a heart next to my comment or a simple “Thank you” reply. They never visit my page and never try to make it go both ways. This unfortunately makes me want to stop commenting on their work or start doing it way less often.
Bring people to your page as you post
Before and after posting – interact with your followers’ posts. For me, a lot of people I follow are also my followers, so I just go through my home feed.
The “Following” feed is a fantastic tool to utilize, as you can interact with the people who posted most recently first!
Like others’ content, leave meaningful comments (not one-word or single-emoji comments) and make the creators want to visit your page in return. This will boost your newest post as both the creators you commented on, as well as their photo viewers, might spot your comment and visit your account.
Another technique that can drive people to your page is liking everyone’s comments on your previous post right after posting. This way, there will be a notification of your action in each user’s Notification list, which can make them curious to view your profile.
Post regularly
Growing your account on Instagram requires regular work. Ever since I’ve had this account, I have always posted regularly. This doesn’t mean posting daily. Regular posting can also be every few days, twice a week, or every week.
For more than four years, I posted every single day. As I started to feel that I cannot handle as many new posts, I switched to sharing three new photos a week (Monday, Wednesday, Saturday) and two reels (Tuesday, Friday). I’ve been keeping this schedule ever since.
Your followers need to know that you’re here every day/2nd day/n days. Don’t post more often than you can provide in the long term, or you’ll end up breaking the consistency when you run out of photos or time. But don’t overdo it – there are people who don’t like to see too many photos from a user in their home feed, and that might lead to an unfollow.
Take note that it is also better to post less frequently, but good quality content on your page, rather than post daily average/bad quality content.
When someone visits your page, the way your page looks is the first impression. If your recent posts were made a month or more ago, the user might not want to follow you, because you might not be active.
Build your profile
The previous steps help you with getting new visitors to your profile. But what’s next? They also need to want to follow you.
When a person discovers your account, the first thing they do is visit your profile. That means – your profile photo, your name line, your bio, highlights, and the look of your feed are just as important. The better of an impression you leave, the better the chance that the new visitor will press “Follow”. The text in your name line and bio works towards the search and SEO.
When a user visits your account, you have 10 seconds to convince them to stay. If your profile is hard to understand, there’s no clear niche, and your feed doesn’t look fitting for them, they’ll leave.
Your profile photo
This is just as important an aspect as the texts written in your profile.
There are two aspects you can look at a profile photo: when a profile is visited and when viewing the comments.
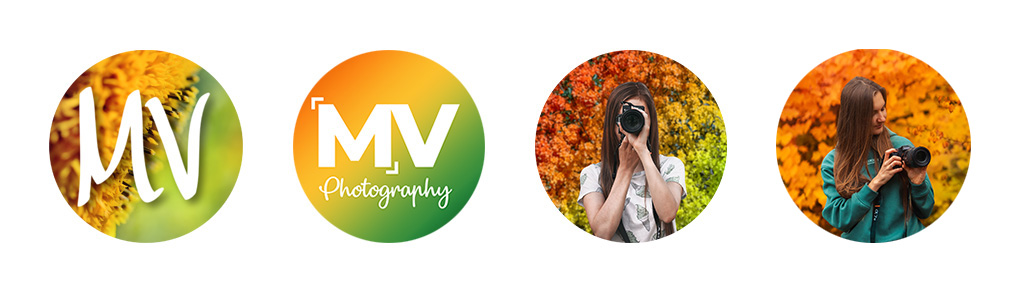
A profile photo should be distinguishable from all the other profile photos, and the subject in it should be clear. This is important when you visit the comment – all the profile photos are small. I have had my signature colors of orange, yellow, and green, and have switched to orange and teal. They stand out very well against all the other users’ comments.
The other aspect is that a profile photo should show something of yours. A good practice is either a photo of you or a photo of what you create. I used to have a logo, which was not a good practice for a page like mine. People kept mistaking me for a feature hub. In 2022, I switched to a photo of myself holding a camera. This way, I add more personality to my profile.
You can see how my profile photo has evolved throughout the life of my Instagram account @macro.viewpoint:
Your name line
The text in your name line should have your name as well as keywords that other people would search for in order to find an account such as yours. Don’t repeat your username in the name line – it’s already serving as a keyword.
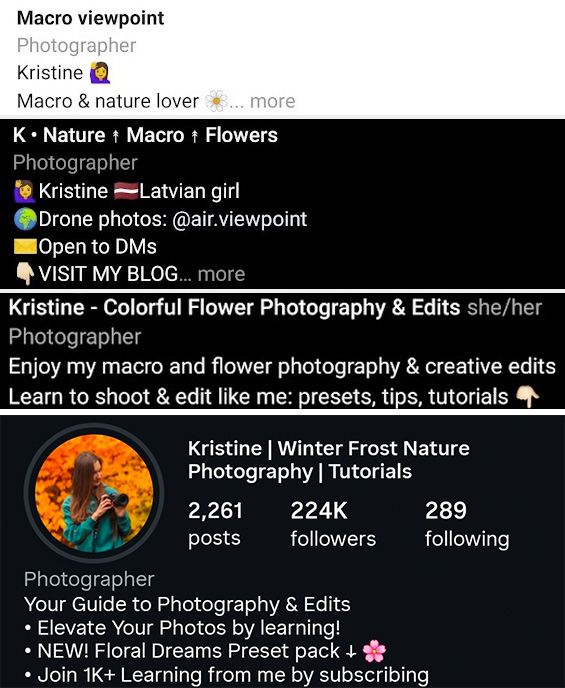
I have the following text as my name line during the flower Season: “Kristine – Colorful flower photography & edits”. When a person opens the messages, my name is the first word that appears in the list, so they know who they’re chatting with. The rest of the words serve as keywords that people can search to find my account.
Your bio
What’s written in your bio is just as important. This is the first thing a visitor reads as they open your account.
It’s important to be clear about what your account is about and why a person should follow you / what they would gain. The text in the bio shouldn’t be too long, as longer texts get hidden under the “more” button, often hiding valuable information.
If you have a location or an email address in your bio – move it to the contacting options (button / Address field).
Here’s how my name line and bio have evolved, gradually incorporating the techniques I mentioned.
Your highlights
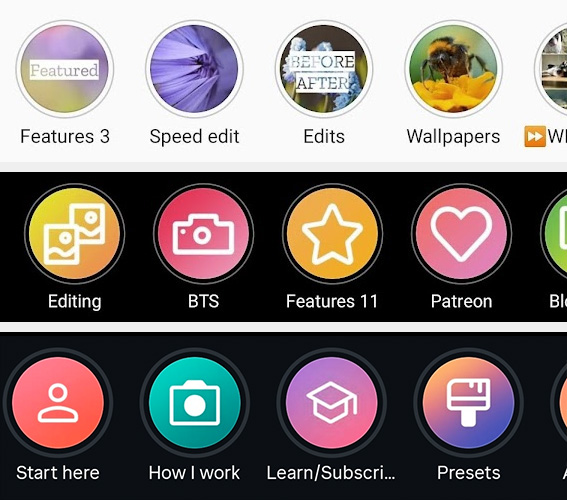
This is the last thing a person looks at before scrolling down to your feed. Highlights are a very important aspect as they can provide a deeper understanding of your account.
It is important to have an “About me”, “Start here” or similar highlight that shares more information about you, guides the user into your profile, and perhaps includes a photo of the person behind the profile. People like “meeting” the person behind the account – this way, the account adds a personality, and people might get more attached to you and decide to follow you.
Another great option for a story highlight is “Behind the scenes” or “How I work”. Showcase what happens as you create your work. Show something more from you.
Having the correct order of your highlights is also an important aspect. The “About me” highlight should be one of the first! Did you know there is an easy way how you can reorder your story highlights? Tap here to learn.
It’s also important that the highlights have covers, and they have a consistent style, so it’s easy to understand what each highlight is about from them.
Here’s how my story highlights have evolved from late 2021 to today.
Define your niche
I often see one issue in many profiles that want to grow their account: an unclear niche.
An unclear niche can look like:
- A mix of very personal posts and photography/art posts, creating chaos in the feed
- A bio that doesn’t explain what the account is about, and what you can offer to the potential follower
- Non-existent highlights that guide the user into your profile
Following the previous points of building up your profile can make your account look more interesting to new viewers and define your niche.
Here’s how I clearly define the niche (macro and flower photography and edits) of my profile:
- Username: @macro.viewpoint includes the “macro” keyword
- Name tag: “Kristine | Winter Frost Nature Photography | Tutorials” includes my actual photography topics and includes the tutorial keyword
- Bio includes my key niches “Photography & Edits” and mentions that I teach photography and create Lightroom presets
- Highlights include “Start here” where I introduce myself, explain what I do, and offer in this account, continued with other relevant highlights.
Host a contest
A very good way of getting more exposure is hosting a contest. It can be a photography voting contest, a lottery, an editing contest, or something else.
You could be asking – “How will a contest get me new followers?”
You can ask the participants to follow you, or ask the participants to share your contest announcement/posts in their story to participate.
If you’re creating a contest where people need to vote for the best photo, then the participants might share your contest in their story, asking their followers to vote for their photo. This brings new people to your profile, and some of them might find your page appealing and even give you a follow.
Here are some contests I have hosted:
- Editing contest (users edit my photo, and people vote for the best edit)
- Photo contest (people hand in photos matching my topic of choice, and people vote for the best one)
- A giveaway (people mention other users in the comments or share the post in their story to get tickets)
Don’t forget about the prizes. For users to participate in your contest, you need to have tempting prizes.
Here are some prize ideas:
- Story shoutouts that get pinned to your highlights
- A post with their content in your feed that stays there for a week
- An award certificate
- Other benefits you can offer with your knowledge, skill, or possessions (an edit of their photo by you, or access to your presets, courses, tutorials)
Promote your posts
If nothing else works, you can always promote your posts or create advertisements from scratch. This all, of course, is for money.
To create a promotion, your account needs to be a business account, and it needs to have a Facebook page connected.
When your account is switched to business, you will have a new button next to each of your posts – “Promote”. You will have the option to choose your target audience (if you choose automatic, most probably it will be your own country), your budget, and the duration of the promotion. After completing the setup, you will have to wait for Instagram to approve your ad.
When the ad is live, your post will be shown to people in your chosen audience. Take note that you need to connect a credit card or a PayPal account to create promotions.
Conclusion
If you want your Instagram to grow, focus on the actions that build momentum over time.
Be easy to discover (keywords, locations, niche hashtags), be worth following (a clear profile and consistent quality), and be present (real interaction before and after you post). Avoid shortcuts like follow-for-follow and instead build an audience that actually cares, because those are the followers who will save, share, comment, and keep coming back.
Pick 2 to 3 points from this guide, apply them consistently for a month, and track what changes. Growth is rarely one magic trick. It is repeated good decisions, done for long enough for Instagram and people to notice.