
You’ve probably noticed new kinds of stories appearing on Instagram—ones with pinned text that you can add your photo below, or even ones with a cutout in a picture for your image. Those are Instagram story templates, and today, I’ll teach you how to make them yourself.
TABLE OF CONTENTS
What is an Instagram story template?
An Instagram story template is a story with the “Add Yours” sticker that allows you to add your photo to the template. Once you share a new story template, anyone can use it to add their perspective on the concept.
How many different kinds of templates are there?
There are just two kinds of Instagram story templates:
- A textual prompt inside the “Add Yours” sticker,
- A template with pinned elements.

How to create an Instagram story template?
I will walk you through creating every kind of Instagram story template.
Earlier, I mentioned that there are just two types. However, the template with pinned elements splits into multiple types of templates requiring different tools for each.
How to create a simple “Add Yours” Instagram story template?
The “Add Yours” Instagram story template type is as simple as typing your text to go in the box. If you can’t think of anything to type in, tap the dice for inspiration.
Here are some examples that suit photographers such as me:
- Post some flowers
- Share your favorite photo
- Behind the scenes

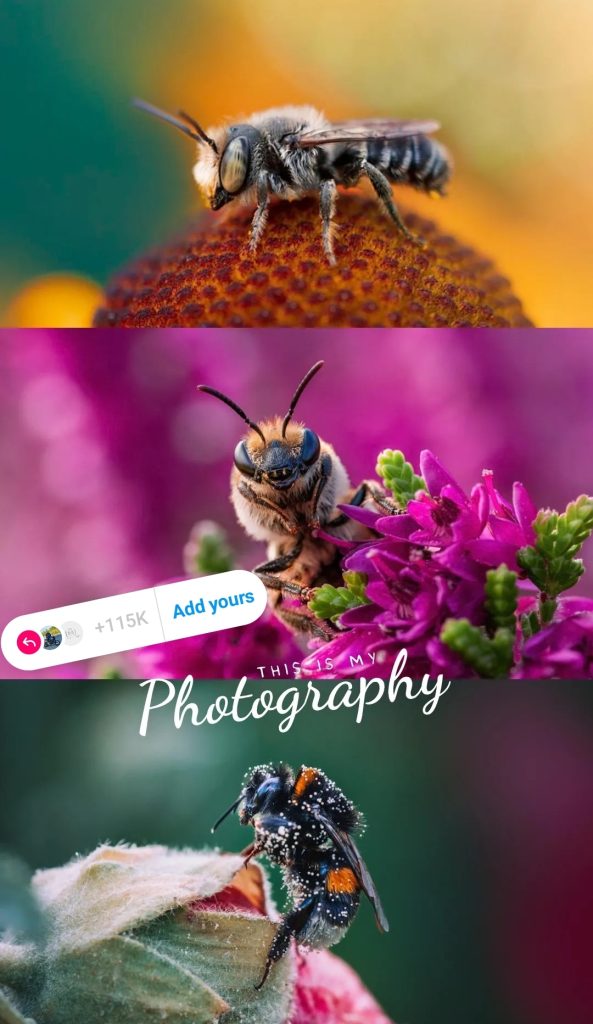
How to create an Instagram story template with pinned elements?
The easiest option is to pin elements that Instagram automatically offers: text and GIFs.
Creating a story template using built-in tools
You can create a template using the text tools and fonts already provided by Instagram.
Here’s how to create a simple Instagram story template using only the tools that Instagram provides:
- Add your photo first. This won’t be pinned as that’s the background
- Add elements you want to be pinned. For text, choose the placement, style, and design of the text
- Select the “Templates” sticker
- Instagram will now prompt you to tap on everything you want to pin. Select all of your added elements
- Choose the placement of the “Add Yours” sticker
- Post the story
All done! When others tap on your story’s “Add Yours” sticker, they can add their background picture, and all of the pinned elements will appear on top.
Creating a story template using custom fonts
A more unique approach to creating Instagram story templates is adding text using your fonts. Why’s that? Not everyone can create story templates like this as the necessary tools aren’t available on Instagram
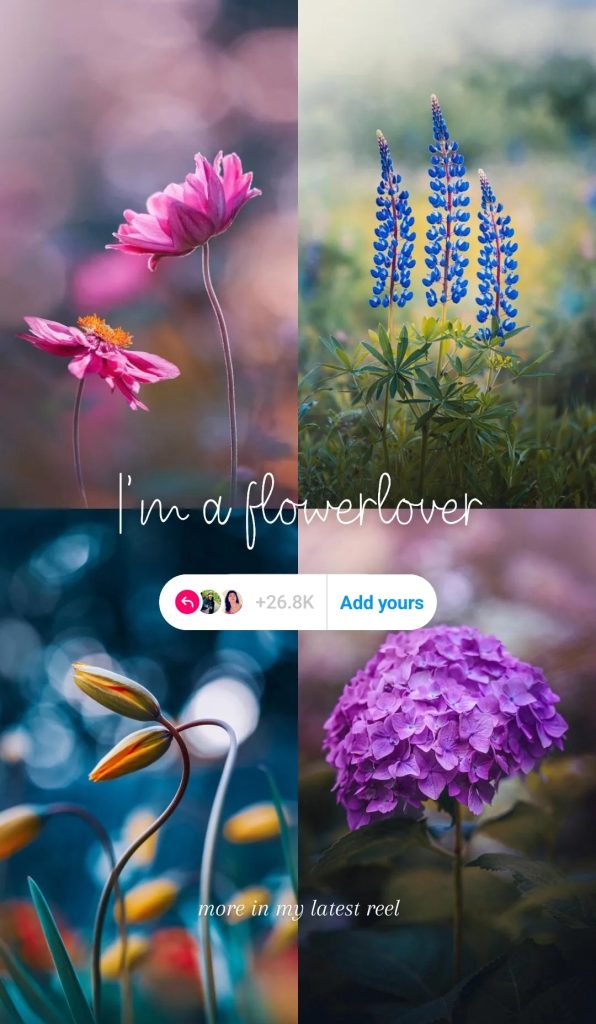
How to create texts with custom fonts to add to an Instagram story?
You will need to create a PNG photo with the text of your choice. A PNG photo ensures the background is transparent, so the text will appear as if it were a text added through Instagram.
Applications to use for creating custom font texts for Instagram story templates:
It’s an application I’ve been using for a long time to design my Instagram stories with texts.

This app allows you to add text to your photos. However, what helps with creating Instagram story templates is the ability to use a transparent background.
Another fantastic feature is the ability to add your fonts. There is a large variety of fonts you can download in Google Fonts.
The final feature I wish to highlight is the ability to save projects and return to them later. This is great for repetitive stories where I need to use a different background photo every time, while the text remains the same.
2. PicsArt app
Not only it’s a great free photo editing app, but it also allows you to add text and do so much more with it.

Just like with the “Add Text” app, you can choose “Blank” when creating a new project, and the background will be transparent.
Sadly, there’s no option to add your custom fonts, and the font list in the free version is very limited.
3. Adobe Photoshop on a computer
Finally, there’s Photoshop, which you can use to create custom text elements for story templates.
I use Adobe Photoshop and Lightroom to edit my photos. But Photoshop can be used for a lot more!

The feature list of the app is vast, and creating texts using installed fonts on your device and saving them with a transparent background is one of them.
Now that you have a PNG file with the text, what should you do next?
How to add a PNG with custom fonts to an Instagram story?
- Add your photo first. This won’t be pinned as that’s the background
- Choose the Photo sticker and select your PNG with custom text
- Repeat the 2nd step for every text you wish to add
- Select the “Templates” sticker
- Instagram will now prompt you to tap on everything you want to pin. Select all of your added elements
- Choose the placement of the “Add Yours” sticker
- Post the story
All done! Just like with Instagram texts, when others tap on the “Add Yours” sticker from your story, they can add their background picture, and all of the pinned texts will appear on top.
Creating a story template with a transparent see-through cutout
This is the most popular story template concept lately: a photo with a cutout or see-through area where you can add your photo.
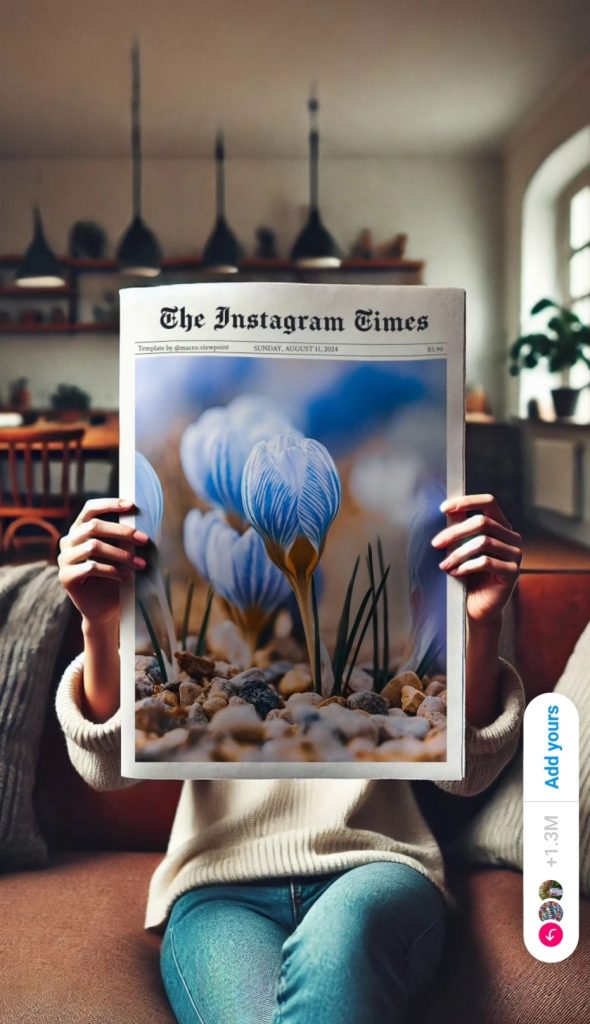
This is a more challenging kind of Instagram story template to create.
Your goal is to create a PNG photo with a transparent area for a photo to be added.
I’ll walk you through applications to use for creating see-through cutout Instagram story templates.
Creating templates using Adobe Photoshop on a computer
This is my go-to program for creating my templates.
Follow these steps to create your Instagram story template with Photoshop:
1. Get a photo with an area to make transparent
It could be a camera screen, a photo frame, a window, or anything else you can imagine.
2. Open the photo in Photoshop
Drag and drop it or use the File -> Open menu to find your photo.
3. Create a mask on the layer
With the layer selected, click on this icon:

4. Select the area you want to make transparent
You can use various tools to select an area in Photoshop. Here are my suggestions:
- Object Selection Tool: draw a rectangle over your area and Photoshop will select the object. This works well with well-defined objects
- Magic Wand Tool: if the canvas you want to turn transparent is white, this will work very well. Play around with the Tolerance setting to improve your selection
- Quick Selection Tool: Similarly to the Magic Want Tool – it also selects similarly colored areas easily
- Lasso Tool: This works great if you’re able to draw a precise line around your element to be removed
- Polygonal Lasso Tool: Similarly to the Lasso Tool, this tool allows you to draw an area to be selected, but using only straight lines. It’s great for straight lines such as canvas sides
Here’s what the photo should look like after completing this step:

5. Remove this area from the mask
You can do it in two ways: draw over the mask with a black brush or remake it.
a) Draw over the mask with a black brush:
Ensure the mask is selected and has a square around it
Select a Brush Tool, Pick a black color and color in the selected area. Everything black becomes transparent
b) Remake the mask
First, right-click on the mask and delete it.
Invert the selection with CTRL + SHIFT + I
Then, click on the mask icon again
This is how your photo should look now:

6. Improve the mask
Deselect with CTRL + D if you haven’t already.
Zoom in and observe the sides of the see-through area.
Adding a layer of your photo below can help. Switching between light and dark photos helps you observe the imperfections of all kinds of scenes.
You might have part of the canvas still appear white, or the side might not have been selected properly, such as here:

If there’s an area you haven’t removed with the selection, fix it:
- Zoom in on the area
- Select a Brush tool, pick a small brush size
- Click on the mask
- If you want to make an area transparent, choose a black brush. To add an area back in – choose a white brush
- Draw over the area you want to alter
- Repeat for every area until the result satisfies you
You might want to combine the brush tool with the previously mentioned tools to select an area. I’ve noticed that making a new selection and using a brush inside provides better results.
Here’s how the result looks after completing these steps:

7. Export the template
Hide the layer of your photo if you added one below the template.
Export the photo as a PNG. Use the File -> Save As menu to do so.
The PNG file format ensures that the transparent area remains transparent when you add the photo to Instagram.
Creating templates using the PicsArt app
You can also create templates using just your phone, but it will be more challenging
Follow these steps to create your Instagram story template: with PicsArt
1. Create a new project using the Blank template

2. Crop to 9:16
Go to Tools -> Crop and select a Story aspect ratio. This is the ratio used by the Instagram story.
3. Add your photo
Go to Add Photo, find the photo you want to use in your template, and add it in.
4. Scale the photo
Resize your photo so it fills the whole project canvas
5. Start erasing
Tap on the eraser icon in the top area

Choose a brush with maximum hardness and select your preferred size.
Draw over an area you want to make transparent.

Zoom in and keep drawing on all the canvas you want to make transparent. This will take a lot of precision.
6. Export
Accept the changes and save your photo once you’ve made all the canvas transparent. PicsArt will automatically save your template as a PNG.
How to use a story template with a transparent see-through cutout
Now that your template is prepared, it’s time to add it to your story.
There’s a specific order you need to add your photos to your story for this to work.
Follow these steps to use a transparent template in Instagram’s story and pin it:
1. Add your background photo
Create a new story and select the photo you want in the background. You need to start with the photo that will appear under your template through the transparent hole.
2. Add your template
Use the Photo sticker to add your template.
3. Scale your template
Tap on the template to remove the rounded edges. Zoom it in to ensure it fills the whole story.
4. Change placement
If the background photo doesn’t fill all of the transparent areas, move your template aside and change the placement of your background photo.
5. Turn it into a template
Select the Template story sticker and tap on all of the elements you want to pin. In this case, that’s just the photo you added above. Click Next to approve
6. Place the sticker
Choose a placement for the Add Yours sticker. Don’t place it too close to the top or bottom of your photo as it can be unreachable for some users who have the username or search bar above those areas.
Your goal is to ensure as many people as possible tap on “Add Yours” and use your template.
7. Post it
Post your story. You can test out the Add Yours sticker in your posted story to ensure everything was done correctly and there are no areas where the photo doesn’t cover the story.
How to add text over a photo in an Instagram story template?
There’s a chance you’ve stumbled upon the issue of adding text over your story template. It always appears behind your pinned photo.
Be not afraid as there are a few workarounds for this issue!
Option 1: use a photo
Create a photo with your text with AddText, PicsArt, or Photoshop using the technique mentioned before.
When done, add it to your story.
Ensure nothing is pinned yet when you add the photo with the text so it doesn’t drown behind the pinned elements. That’s because it’s not possible to add a new and unpinned element above an already pinned element.
Finally – pin all of your elements.
Option 2: use Instagram’s text tools
You can also add text from Instagram’s story text tools – you just need to follow a specific order.
After adding the background photo and the template photo, add your text. Ensure nothing is pinned yet!
You should be able to add and place your text to appear above the template photo.
After arranging your story, add the Template sticker and tap on all the elements you wish to pin. You might need to move some elements out of the way while pinning to pin them all.
How to reorder the layers in an Instagram story?
You might accidentally touch the template photo and it suddenly hides the text behind it.
Simply tap and hold the template photo until two icons appear – layer order and a lock icon.
While still holding the photo, drag your finger up or down to change the order.
Meanwhile, if you wish to lock the layer in place, ensuring nothing disappears behind it while holding down your finger, drag it to the lock icon and release it there. This will ensure it doesn’t pop back above anything else while you prepare your story.
Video tutorial for creating an Add Yours Instagram story template
I’ve prepared a video to help you better understand the necessary steps for adding all the elements to your story and pinning them into a story template. You can also see how to add text above a pinned photo.
Conclusion
Creating Instagram story templates is a fun and creative way to engage your audience and encourage interaction. The possibilities are endless, whether you’re using simple text prompts, using custom fonts, or designing more complex templates with transparent cutouts. Following the steps outlined in this guide, you can create unique templates that allow others to add their personal touch, making your stories more dynamic and shareable.
Don’t forget to experiment with different tools, play around with layouts, and keep your designs fresh. Templates aren’t just a tool for creative expression—they’re also a way to build connections with your audience. So, have fun with the process, and let your creativity shine!