If you follow me on Instagram, you might have noticed the way I share my new posts in my story – a text that reveals a part of the photo. And when you tap on the photo – Instagram navigates you to my newest photo. This see-through text is a story sticker that is placed on top of a new post share (the airplane icon next to any post). If you want to change up the way you share your new post in your Instagram story or just to learn how to create your own such sticker, read further this step-by-step tutorial.
What you’ll need for this tutorial:
- Fonts downloaded and installed to use in the photo
- Adobe Photoshop on your computer
- Knowledge on how to use custom-made Instagram story stickers
Let’s get started
Open Adobe Photoshop and create a new document with the size of your phone’s screen or larger. The proportions should be at least 9:16. 1080×1920 fits the ratio, but to be sure that you place the sticker correctly and don’t have any borders on top or bottom that don’t have the sticker (mostly if the phone’s screen is taller that 9:16), I suggest choosing larger height.
Next – create a new layer and paint it in the color of your desire. I mostly create story stickers in dark gray and light gray colors.
Select Type tool and choose the font for “new post” text. I mostly download them from Google Fonts or dafont.com. Type your text, center it if necessary, and choose the required size.
Next create another text layer (by clicking below your “new post” text) and do the same for “tap here” text.
Next step is to create new empty layer, select the two text layers and the newly created one – and by right clicking on the newest (non-text) layer – choose Merge layers. It will combine all the texts into one layer.
While holding ctrl on your keyboard – click on the thumbnail of the layer that you created. This will select all the content in the layer.
With the content selected – hide all other layers except the colored background that you created (by removing the eye icons), click on the middle layer and press delete. This will remove the selected part from your background layer, therefore making the part transparent.
Save the photo by choosing File -> Save as and choosing the PNG format. This format allows the photo to have transparent background.
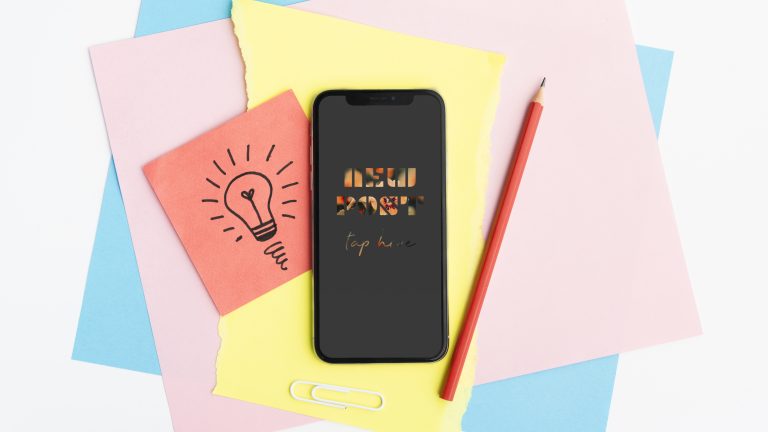
This is the result file of this tutorial for me.
The next step is to copy the photo to your phone and import it in your keyboard’s sticker pack (if you have Android). Learn how to do that in this blog post. If you have Apple device – you can skip the importing in keyboards.
And now – when you share your new post in your story – you can place the imported sticker from your keyboard (Android) or copy it from your file system and paste it on the story (Apple).
Conclusion
You can surely experiment with all of this. Add a gradient of multiple colors as the background instead of a single color. Choose a different text. Create a peek-through circle to reveal more of your photo and add text next to it. The possibilities are endless. Have fun with Photoshop and show what result you got by sending it to me in Instagram. You can also tag me in your stories that use this sticker for me to see the awesome result you got. 🙂